The sound of crisp autumn leaves crunching underfoot always reminds me of those first chilly afternoons spent baking with my grandma. The scent of cinnamon, apples, and buttery crust drifting through the house—honestly, nothing beats it. That’s where these Apple Pie Bars come in: they capture all the magic of classic apple pie, but with a handheld twist you can slice, stack, and sneak for breakfast (hey, no judgment!). I first whipped up this recipe when I wanted something a little less fussy than a traditional pie—no rolling pins or pie weights, just simple layering and slicing. It’s become my go-to fall treat for potlucks, cozy Sunday brunches, and even last-minute bake sales when I need something that tastes like pure nostalgia.
If you’re a fan of apple desserts, you’ll love how these Apple Pie Bars strike the perfect balance between gooey apple filling and a sturdy, buttery base. It’s like biting into the best part of apple pie—times ten. Whether you’re celebrating a holiday or just craving something sweet, this recipe is a game changer. You get that golden crust, juicy apple center, and a crumble topping that honestly deserves a medal. Plus, it’s way easier than a traditional pie, which means less time stressing and more time enjoying (with a mug of spiced cider, preferably!).
After baking these Apple Pie Bars more times than I can count, I’ve dialed in the flavors, textures, and even some shortcuts that’ll make your baking life easier. Trust me, you’ll want to bookmark this recipe. It’s the kind of dessert that feels like a warm hug—perfect for busy families, picky eaters, and anyone who loves apples as much as I do. Let’s get started!
Why You’ll Love This Apple Pie Bars Recipe
- Quick & Easy: You can have these bars ready in just over an hour. No fancy pie skills required, no dough anxiety—just simple layering and baking. Perfect for busy weeknights or when you get that sudden apple pie craving.
- Simple Ingredients: Most of the ingredients are classic pantry staples. You probably have flour, sugar, and butter on hand. Grab some apples and you’re good to go!
- Perfect for Any Occasion: These bars shine at fall gatherings, potlucks, bake sales, and family dinners. They’re easy to transport, slice, and serve—so much less messy than a pie.
- Crowd-Pleaser: Kids adore the sweet, crumbly topping, and adults always ask for the recipe. I’ve never brought these anywhere without someone sneaking a second piece.
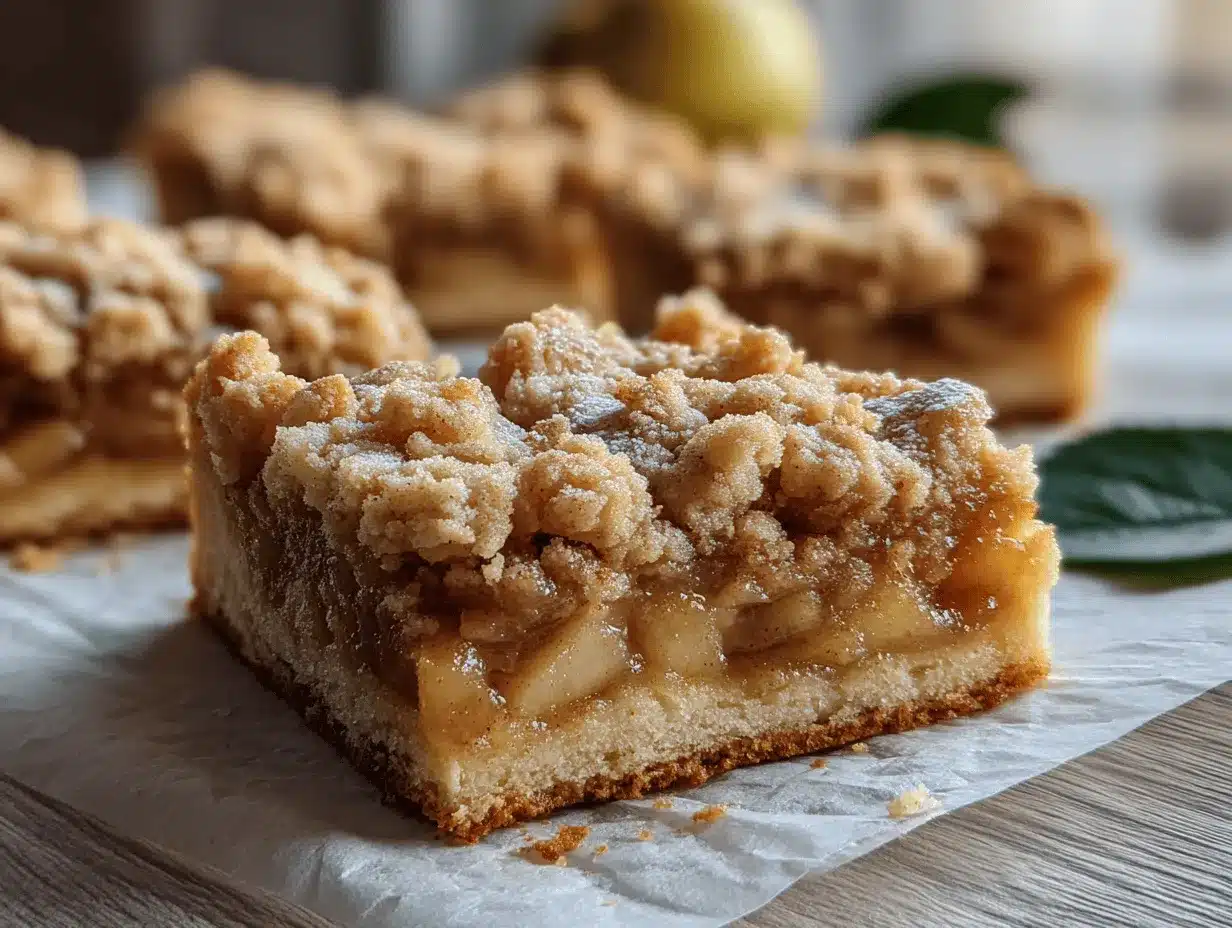
- Unbelievably Delicious: The layers—crisp crust, gooey apple filling, and buttery crumble—make every bite a little celebration of autumn. The cinnamon and nutmeg play perfectly with tart apples.
What makes this Apple Pie Bars recipe stand out? I blend the crust and topping with a touch of brown sugar for caramel undertones, and I use a mixture of apple varieties for depth. The filling gets just enough cornstarch to set perfectly, so you can slice and stack these bars without a mess. You know how some apple desserts get soggy? Not here—the crust stays crisp, the apples stay tender, and the topping is crumbly magic.
Honestly, these bars feel like comfort food in every sense. They’re healthier than a pie (less butter, more fruit), but the flavor is pure indulgence. If you want to impress guests or just treat yourself, this recipe is my secret weapon. It’s the kind of dessert you make once and crave for months. Trust me, after your first batch, you’ll be making these Apple Pie Bars every fall!
Ingredients Needed for Apple Pie Bars
This recipe uses simple, wholesome ingredients to deliver bold flavor and that perfect pie-bar texture—no fancy stuff, just what you’d expect from a classic homemade treat.
For the Crust and Crumble Topping:
- 2 ½ cups (315g) all-purpose flour
- ¾ cup (150g) granulated sugar
- ¾ cup (165g) packed light brown sugar
- 1 tsp ground cinnamon (adds warmth)
- ¼ tsp ground nutmeg
- ½ tsp salt
- 1 cup (226g) unsalted butter, melted (use vegan butter for dairy-free)
- 1 large egg, room temperature
- 1 tsp pure vanilla extract (for extra flavor)
For the Apple Filling:
- 5 cups (about 5-6 medium) apples, peeled, cored, and diced (mix tart and sweet—Granny Smith + Honeycrisp is my favorite combo)
- ½ cup (100g) granulated sugar
- 2 tbsp (16g) all-purpose flour (helps thicken)
- 2 tsp ground cinnamon
- ¼ tsp ground nutmeg
- 2 tbsp (30ml) fresh lemon juice (keeps apples bright)
- 2 tsp cornstarch (for the perfect gooey texture)
Optional Glaze:
- ½ cup (60g) powdered sugar
- 1-2 tbsp (15-30ml) milk (or dairy-free alternative)
- ½ tsp vanilla extract
Ingredient Notes & Substitutions:
- Flour: Swap for a 1:1 gluten-free blend if needed. Almond flour works but will make the bars more crumbly.
- Butter: I love Kerrygold for richness, but store-brand works fine. Coconut oil is a good dairy-free option.
- Apples: Mix types for depth. If you’re out, pears also work—or add a handful of cranberries for tartness.
- Egg: Flaxseed “egg” will work for a vegan version (1 tbsp flaxseed meal + 3 tbsp water).
- Spices: Add extra cinnamon or a pinch of cloves if you like a stronger fall flavor.
Honestly, these ingredients are super flexible. I’ve swapped sugars, used different apples, and even thrown in a handful of oats in the topping. The bars always turn out delicious!
Equipment Needed
- 9×13-inch (23x33cm) baking pan: Standard size for bars. I use a metal pan for crisp edges, but glass works too.
- Parchment paper: Makes lifting and slicing easy. If you’re out, grease the pan well.
- Mixing bowls: At least two—one for crust/topping, one for apples.
- Whisk or fork: For blending dry ingredients and eggs.
- Rubber spatula: Helps spread layers evenly.
- Chef’s knife and cutting board: For peeling and chopping apples. I use my trusty old paring knife—it’s not fancy but does the job.
- Measuring cups and spoons: Precision matters for baking.
- Cooling rack: Optional, but helps bars set up faster.
If you don’t have a 9×13 pan, split the recipe into two 8×8 pans. For budget-friendly options, I’ve used dollar-store pans and silicone spatulas—no shame! Just make sure to line or grease well, especially if your pan is older (trust me, I’ve learned the hard way).
Preparation Method
- Prep the Pan: Line a 9×13-inch (23x33cm) baking pan with parchment paper, leaving an overhang on the sides for easy lifting. Lightly grease with butter or cooking spray for bonus stick-proofing. Preheat your oven to 350°F (175°C).
- Make the Crust & Crumble: In a large mixing bowl, whisk together 2 ½ cups (315g) flour, ¾ cup (150g) granulated sugar, ¾ cup (165g) brown sugar, 1 tsp cinnamon, ¼ tsp nutmeg, and ½ tsp salt. Pour in 1 cup (226g) melted butter, 1 large egg, and 1 tsp vanilla. Mix until a crumbly dough forms—don’t overmix, or it’ll get tough.
- Press the Crust: Take about 2/3 of your dough and press it firmly into the bottom of your prepared pan, forming an even layer. Use the bottom of a measuring cup for a smooth surface. The dough will look sandy but should hold together when pressed.
- Prepare the Apple Filling: In a second bowl, toss 5 cups diced apples with ½ cup (100g) sugar, 2 tbsp (16g) flour, 2 tsp cinnamon, ¼ tsp nutmeg, 2 tbsp (30ml) lemon juice, and 2 tsp cornstarch. Stir until apples are coated and mixture looks glossy.
- Layer the Filling: Spread the apple mixture evenly over the crust. Try to distribute apples so every bar gets plenty of fruit. You’ll see the cinnamon start to mingle with the apple juices—yum!
- Add the Crumble Topping: Sprinkle the remaining dough (about 1/3) evenly over the apples. Leave some gaps to let the apples peek through. If you like extra crunch, add a handful of chopped nuts or oats to the topping here.
- Bake: Bake in preheated oven for 40-45 minutes, until the topping is golden and apples are bubbling around the edges. Rotate halfway if your oven has hot spots. The scent is going to be amazing!
- Cool: Let the bars cool in the pan for at least 30 minutes, then lift them out using the parchment overhang. They’ll slice more cleanly if you let them cool completely on a rack. If you’re impatient (who isn’t?), you can sneak a piece while warm—just expect a little mess!
- Glaze (Optional): Whisk ½ cup (60g) powdered sugar, 1-2 tbsp milk, and ½ tsp vanilla until smooth. Drizzle over cooled bars for a bakery-style finish.
- Slice & Serve: Cut into 16 bars (or smaller squares for bite-size treats). Bars will hold their shape best once fully cooled.
Troubleshooting: If your bars look too wet, let them bake 5-10 minutes longer—apples vary in juiciness. Crust too dry? Add a splash more melted butter to the dough. If apples aren’t soft enough, chop smaller next time. My tip: always taste your apples first! If they’re super tart, add a little more sugar.
Cooking Tips & Techniques
- Apple Types: Use a mix of tart (Granny Smith) and sweet (Honeycrisp, Fuji) apples for a deeper flavor. I learned the hard way—once used all Red Delicious, and it was way too bland.
- Chopping: Dice apples evenly so they cook through at the same rate. If your pieces are too big, you might get crunchy bits.
- Topping Texture: Don’t overwork the crumble. Mix just until everything is moistened—otherwise, you’ll get a hard topping instead of a crumbly one.
- Spicing: Taste your filling before layering. Some apples need more cinnamon, and honestly, a pinch of salt can wake up the flavors.
- Multitasking: Chop apples while the crust is baking for a few minutes (if you want extra crunch, you can par-bake the crust for 10 minutes before adding filling).
- Consistency: Always measure flour by spooning and leveling. Scooping packs it too tightly, which can make the crust tough.
- Personal Oops: I once forgot the parchment paper—bars stuck like glue! So don’t skip lining the pan, unless you like eating with a spoon.
- Baking Evenness: Rotate your pan halfway through baking if your oven isn’t super consistent. The edges cook faster than the center.
Little details make a big difference—trust me, these tips are hard-earned from many messy, delicious batches!
Variations & Adaptations
- Gluten-Free: Use a 1:1 gluten-free baking flour (like King Arthur or Bob’s Red Mill). The bars may be a touch more crumbly, but the flavor is still spot-on.
- Vegan: Swap butter for plant-based margarine or coconut oil, and replace the egg with a flaxseed “egg” (1 tbsp ground flaxseed + 3 tbsp water, mixed and rested for 5 mins).
- Nutty Crunch: Add ½ cup chopped pecans or walnuts to the crumble topping. I love this version—it adds a toasty flavor that pairs perfectly with apples.
- Berry Twist: Mix in 1 cup fresh or frozen cranberries or raspberries with the apples for a tart kick.
- Spiced Up: Try pumpkin pie spice instead of just cinnamon and nutmeg for an autumnal flavor bomb.
- Cooking Methods: For a smaller batch, halve everything and bake in an 8×8-inch (20x20cm) pan. If you want mini bars, use a muffin tin—just watch the bake time (about 25-30 minutes).
- Personal Favorite: Sometimes I layer a thin spread of caramel sauce atop the apples before adding the crumble. It doesn’t set as firmly but tastes like caramel apple pie bars—out-of-this-world!
Whatever your dietary needs or flavor cravings, these Apple Pie Bars have you covered. Make them your own!
Serving & Storage Suggestions
These Apple Pie Bars are best served slightly warm or at room temperature. I love plating them on a rustic wooden board with a dusting of powdered sugar—it looks so inviting for fall parties or Instagram snaps. For an extra treat, add a scoop of vanilla ice cream or a dollop of whipped cream (trust me, it’s worth it!).
Pair with spiced cider, hot coffee, or even chai tea for the ultimate cozy dessert moment. If you’re serving at a brunch, they go great alongside scrambled eggs and crispy bacon—kind of an all-American breakfast spread.
To store, cool bars completely and keep in an airtight container at room temperature for up to 2 days. In the fridge, they last up to 5 days, though the crust softens a bit. For longer storage, freeze slices wrapped in wax paper and sealed in a freezer bag—thaw overnight in the fridge or reheat for 20 seconds in the microwave. The flavors actually get richer after a day, so leftovers are a bonus!
Nutritional Information & Benefits
Each Apple Pie Bar (based on 16 servings) has approximately:
- Calories: 220
- Fat: 8g
- Carbohydrates: 35g
- Protein: 2g
- Sugar: 18g
- Fiber: 2g
Apples are loaded with antioxidants, vitamin C, and fiber. Using less butter and sugar than a classic pie keeps things lighter. If you go gluten-free or vegan, it’s easy to adapt without sacrificing flavor. Watch out for allergens—contains wheat, dairy, and egg (unless you use the substitutions).
Honestly, I love that you can sneak a serving for breakfast and feel good about getting a little fruit in. These bars hit the sweet spot between indulgence and comfort food, making them perfect for any fall wellness routine.
Conclusion
So there you have it—Apple Pie Bars that bring the flavors of fall into every bite. They’re quick, easy, and packed with the kind of cozy comfort that makes autumn so special. Whether you’re baking for a holiday crowd or just treating yourself, this recipe is a keeper.
Feel free to mix up the spices, swap the apples, or add your own twist. That’s the beauty of homemade desserts—making them just the way you love! Personally, I can’t resist a warm bar with a drizzle of caramel and a scoop of vanilla ice cream. It’s the kind of treat that makes you look forward to crisp evenings and family gatherings.
If you try these Apple Pie Bars, leave a comment below with your favorite variation, or share your baking tips! Pin it for later, tag me on social media, and let’s keep the apple dessert love going. Happy baking—I hope these bars become a fall tradition in your kitchen too!
FAQs
Can I use store-bought pie filling instead of homemade?
You can, but homemade gives a fresher flavor. If using store-bought, reduce the sugar and skip the cornstarch.
What are the best apples for apple pie bars?
I love a mix of tart Granny Smith and sweet Honeycrisp. Fuji, Braeburn, or Gala work too—just avoid apples that get mushy.
How do I prevent soggy crust?
Press the crust firmly and bake until golden. If your apples are very juicy, toss them with an extra teaspoon of cornstarch.
Can I make these bars ahead of time?
Absolutely! Bake, cool, and store in the fridge up to 2 days. They taste even better as the flavors meld.
Are apple pie bars freezer-friendly?
Yes! Slice, wrap, and freeze for up to 2 months. Thaw overnight and enjoy—no need to re-bake!
Pin This Recipe!
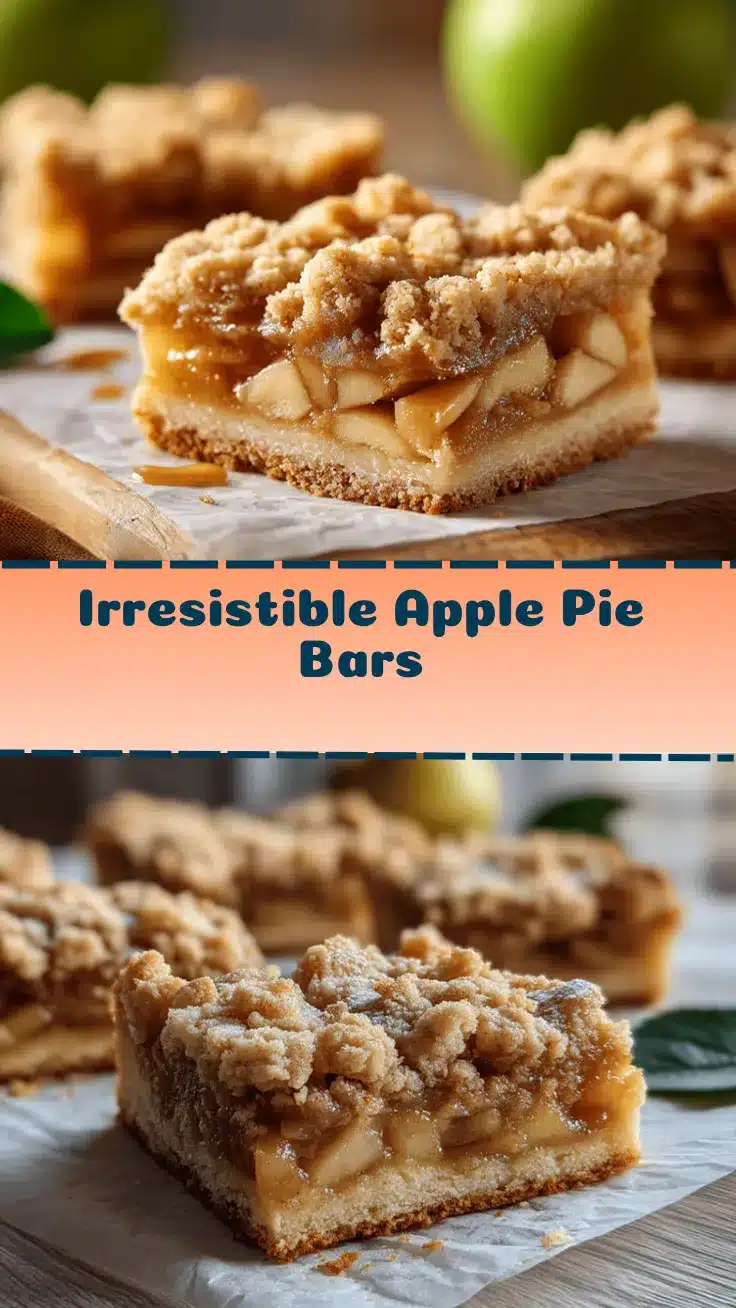
Apple Pie Bars
- Total Time: 1 hour 5 minutes
- Yield: 16 bars 1x
Description
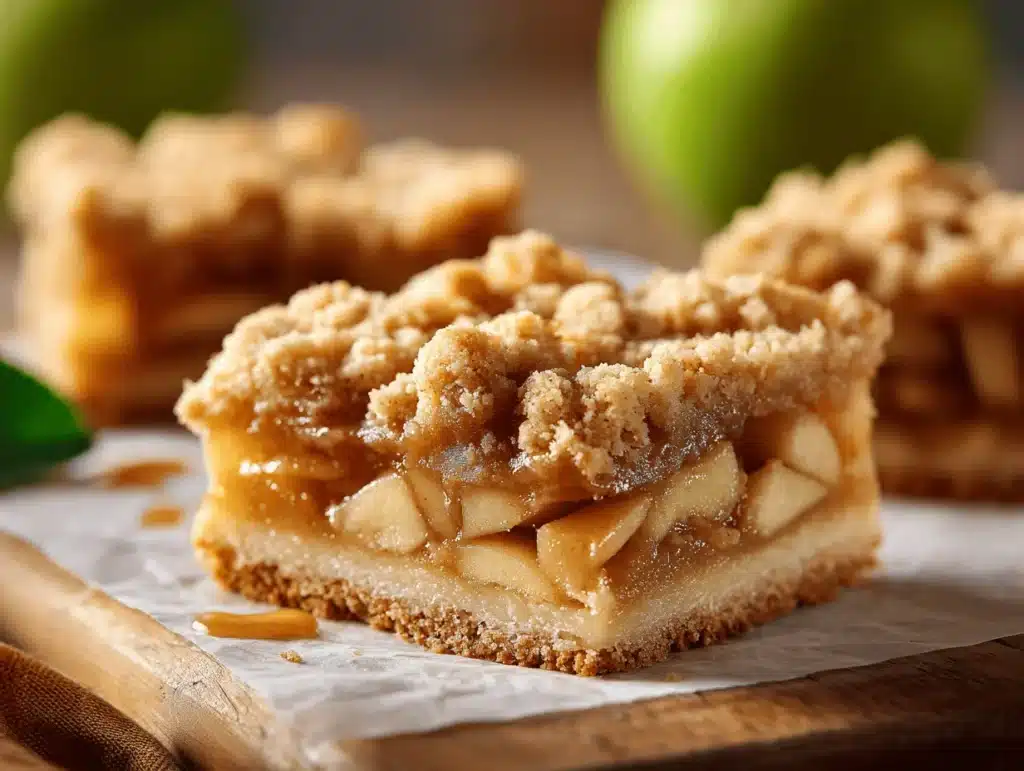
These easy homemade Apple Pie Bars capture all the cozy flavors of classic apple pie in a handheld, sliceable treat. With a buttery crust, gooey apple filling, and crumbly topping, they’re perfect for fall gatherings, brunches, or bake sales.
Ingredients
- 2 1/2 cups all-purpose flour
- 3/4 cup granulated sugar
- 3/4 cup packed light brown sugar
- 1 teaspoon ground cinnamon
- 1/4 teaspoon ground nutmeg
- 1/2 teaspoon salt
- 1 cup unsalted butter, melted
- 1 large egg, room temperature
- 1 teaspoon pure vanilla extract
- 5 cups apples (about 5–6 medium), peeled, cored, and diced (mix tart and sweet varieties)
- 1/2 cup granulated sugar
- 2 tablespoons all-purpose flour
- 2 teaspoons ground cinnamon
- 1/4 teaspoon ground nutmeg
- 2 tablespoons fresh lemon juice
- 2 teaspoons cornstarch
- Optional Glaze: 1/2 cup powdered sugar
- Optional Glaze: 1-2 tablespoons milk (or dairy-free alternative)
- Optional Glaze: 1/2 teaspoon vanilla extract
Instructions
- Line a 9×13-inch baking pan with parchment paper, leaving an overhang. Lightly grease with butter or cooking spray. Preheat oven to 350°F (175°C).
- In a large mixing bowl, whisk together flour, granulated sugar, brown sugar, cinnamon, nutmeg, and salt. Pour in melted butter, egg, and vanilla. Mix until a crumbly dough forms.
- Press about 2/3 of the dough firmly into the bottom of the prepared pan to form an even layer.
- In a second bowl, toss diced apples with granulated sugar, flour, cinnamon, nutmeg, lemon juice, and cornstarch until coated.
- Spread the apple mixture evenly over the crust.
- Sprinkle the remaining dough evenly over the apples, leaving some gaps.
- Bake for 40-45 minutes, until the topping is golden and apples are bubbling around the edges. Rotate pan halfway through baking if needed.
- Let bars cool in the pan for at least 30 minutes, then lift out using parchment overhang. For clean slices, cool completely on a rack.
- Optional: Whisk powdered sugar, milk, and vanilla until smooth. Drizzle over cooled bars.
- Slice into 16 bars and serve.
Notes
Use a mix of tart and sweet apples for best flavor. For gluten-free, use a 1:1 gluten-free flour blend. Vegan option: substitute butter with plant-based margarine or coconut oil, and egg with flaxseed ‘egg’. Add chopped nuts or oats to the crumble for extra crunch. Bars slice best when fully cooled. Store in an airtight container at room temperature for 2 days, or refrigerate up to 5 days. Freeze for up to 2 months.
- Prep Time: 20 minutes
- Cook Time: 45 minutes
- Category: Dessert
- Cuisine: American
Nutrition
- Serving Size: 1 bar
- Calories: 220
- Sugar: 18
- Sodium: 90
- Fat: 8
- Saturated Fat: 5
- Carbohydrates: 35
- Fiber: 2
- Protein: 2
Keywords: apple pie bars, fall dessert, easy apple bars, apple dessert, homemade apple bars, autumn baking, apple recipes, potluck dessert, brunch bars, handheld pie