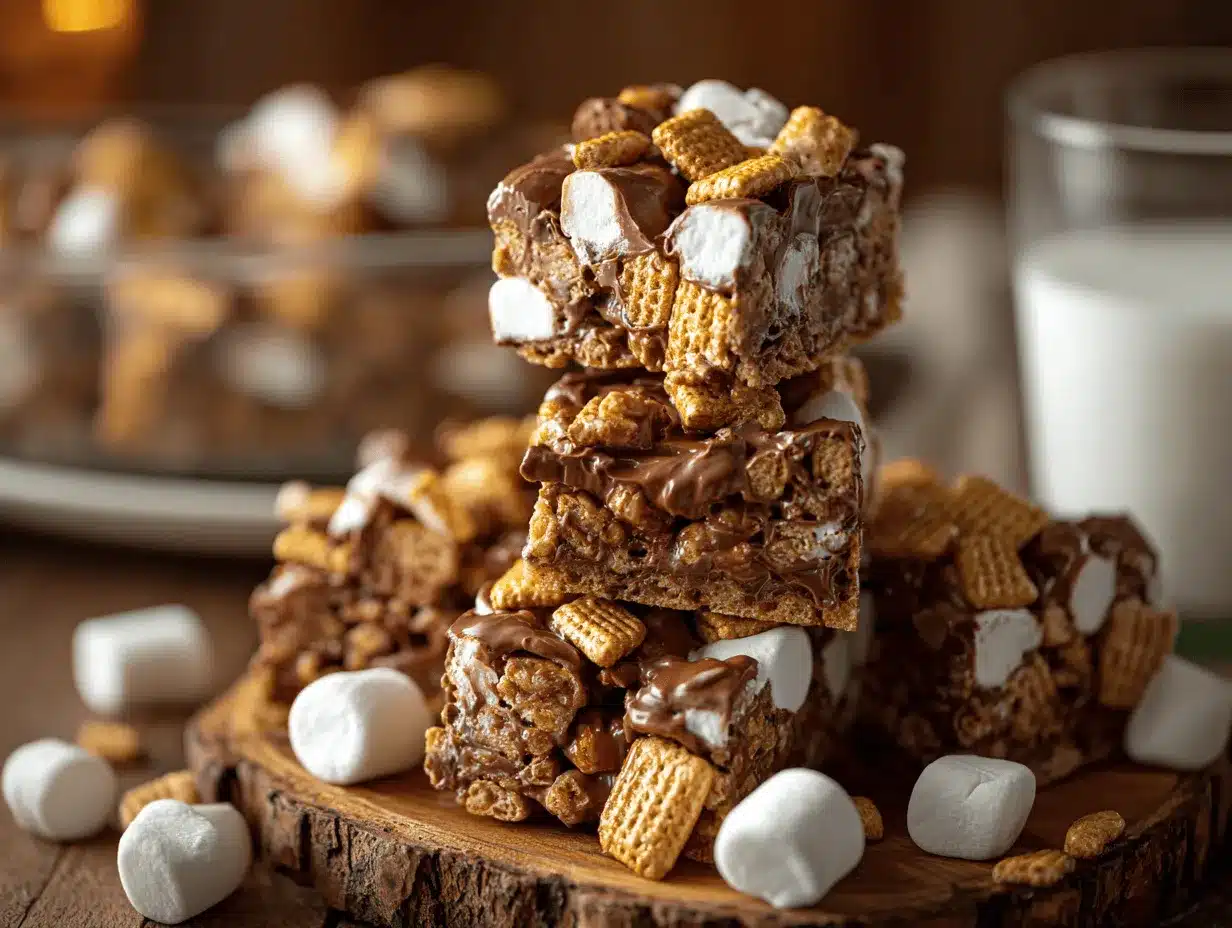
The scent of toasted marshmallows mixed with sweet chocolate always takes me straight back to summer campfires—sticky fingers, laughter, and the magic of a gooey s’more under the stars. But, let’s be honest, sometimes you just want s’mores without a pile of smoky laundry. That’s why I’m obsessed with Golden Grahams S’mores Bars. (Seriously, this recipe is a game changer for busy families and anyone who craves that classic campfire flavor year-round!)
I first made these no bake s’mores bars for a neighborhood block party when I needed something quick, crowd-pleasing, and totally kid-friendly. One bite and I realized they check all the boxes: crunchy, chewy, chocolatey, and ridiculously easy to make. You don’t even need an oven—just a few pantry staples, a microwave, and a pan. The Golden Grahams cereal brings that unmistakable graham cracker taste, while mini marshmallows and chocolate chips create the perfect s’mores vibe.
This Golden Grahams S’mores Bars recipe has earned rockstar status in my house. I’ve whipped up dozens of batches for bake sales, sleepovers, and even as last-minute holiday gifts. If you’re chasing nostalgic flavors or just want a sweet treat that’s ready in under 30 minutes, these bars are for you. And yes, I’ve tweaked the original formula a few times (more chocolate, less marshmallow, all the good stuff!) until it was just right. Trust me—you’ll want to bookmark this one.
Whether you’re a parent, a college student, or simply a dessert lover, Golden Grahams S’mores Bars deliver that melt-in-your-mouth satisfaction with zero stress. Let me show you how easy it is to indulge in this classic campfire treat—no tent required!
Why You’ll Love This Recipe
- Quick & Easy: Comes together in under 30 minutes—no oven, no fuss!
- Simple Ingredients: All pantry staples you probably already have (no fancy shopping trips needed).
- Perfect for Any Occasion: Great for birthday parties, potlucks, movie nights, or just a Tuesday snack attack.
- Crowd-Pleaser: Kids, teens, and adults all rave about these bars. (My picky eater nephew even begged for seconds!)
- Unbelievably Delicious: Crunchy, chewy, chocolatey, and loaded with gooey marshmallow pockets.
I’ve made lots of s’mores-inspired desserts, but this Golden Grahams S’mores Bars recipe stands out for its simplicity and flavor. Blending cereal with melted marshmallows and chocolate chips means every bite packs a punch. Unlike some recipes that get soggy or too sticky, this version stays perfectly balanced—crisp cereal, soft marshmallow, and just the right amount of chocolate.
What makes these bars different? It’s all in the technique. Melting the butter and marshmallows together creates a silky base that holds everything (no crumbly mess!). I always fold in extra mini marshmallows at the end for surprise gooey spots—it’s a little trick I picked up after a few test batches. Honestly, this is comfort food at its easiest: nostalgic flavors, fun textures, and zero stress.
When you need a dessert that feels special but doesn’t demand hours in the kitchen, Golden Grahams S’mores Bars deliver. They’re the treat you’ll crave after a long day, the sweet bite to share with friends, or the perfect midnight snack. Close your eyes, take a bite, and you’re around the campfire again—no bug spray necessary!
Ingredients Needed
This recipe uses simple, wholesome ingredients to deliver big flavor and satisfying texture. Most are pantry staples, making this a perfect last-minute treat. Here’s what you’ll need:
- Golden Grahams cereal (about 6 cups / 180g) – The star ingredient! Brings that classic graham cracker crunch and sweet, honeyed flavor.
- Mini marshmallows (5 cups / 250g, divided) – You’ll melt most for the base and fold in some at the end for gooey pockets.
- Milk chocolate chips (1 ½ cups / 260g) – Classic s’mores flavor. Feel free to use semi-sweet if you prefer a richer taste.
- Unsalted butter (¼ cup / 60g) – Adds richness and helps the bars set up nicely.
- Vanilla extract (1 teaspoon / 5ml) – A little goes a long way to deepen the flavor.
- Pinch of salt – Optional, but it rounds out the sweetness. Use sea salt for a little extra pop.
Optional add-ins or substitutions:
- Peanut butter chips (½ cup / 90g) – For a nutty twist.
- Dark chocolate chunks – Swap out milk chocolate for more intense flavor.
- Dairy-free butter – Works just fine for a vegan version (use vegan marshmallows too!).
- Gluten-free graham cereal – If you’re avoiding gluten, try a certified gluten-free brand.
- Extra mini marshmallows – Sprinkle on top before pressing for a dramatic look.
I always use Jet-Puffed mini marshmallows for the best melt and texture, but store brands work in a pinch. For the chocolate, Ghirardelli milk chocolate chips melt smoothly and taste amazing. If you want to experiment, swap the Golden Grahams for Cinnamon Toast Crunch or Chex—just know it’ll change the flavor profile.
In summer, toss in a handful of fresh strawberries for a fruity twist. For fall, a dash of cinnamon or pumpkin spice makes these bars even cozier. Just remember, the base recipe is super forgiving—so don’t stress if you’re missing an ingredient or two. The magic is in the mix!
Equipment Needed
You don’t need much to whip these up—no fancy gadgets required!
- Large mixing bowl – For combining all the ingredients. A big one makes folding easier.
- Medium saucepan or microwave-safe bowl – For melting butter and marshmallows. (I use the microwave for speed, but stovetop works too.)
- Rubber spatula – Essential for stirring and spreading the sticky mixture.
- 9×13-inch (23x33cm) baking pan – For shaping and setting the bars. You can also use a smaller pan for thicker bars.
- Parchment paper or nonstick foil – Makes cleanup and lifting the bars a breeze.
- Measuring cups and spoons – Accuracy counts, especially for marshmallows and cereal.
If you don’t have a 9×13-inch pan, an 8×8-inch (20x20cm) square pan works—just know the bars will be taller and might need a bit more time to set. I’ve used glass and metal pans; both work, but metal cools a little quicker. For budget-friendly options, sturdy disposable pans are lifesavers for potlucks or parties.
Rubber spatulas are my go-to, but a wooden spoon can work—just coat it with a little butter or cooking spray first (trust me, sticky marshmallow fights are not fun!). To keep pans in top shape, always line with parchment or foil and avoid metal utensils. Less scrubbing, more snacking!
Preparation Method
- Prep the pan: Line a 9×13-inch (23x33cm) pan with parchment paper or nonstick foil, leaving an overhang for easy lifting. Lightly grease if needed. This step saves you from prying sticky bars out later!
- Melt the butter and marshmallows: In a large microwave-safe bowl, combine ¼ cup (60g) unsalted butter and 4 cups (200g) mini marshmallows. Microwave in 30-second bursts, stirring each time, until fully melted and smooth (about 1½–2 minutes). If using stovetop, melt over low heat, stirring constantly.
- Add vanilla and salt: Stir in 1 teaspoon (5ml) vanilla extract and a pinch of salt. The mixture should look glossy and smell sweet.
- Mix in Golden Grahams: Quickly fold in 6 cups (180g) Golden Grahams cereal. Stir gently but thoroughly—every piece should be coated, but don’t crush the cereal.
- Fold in chocolate chips and extra marshmallows: Add 1½ cups (260g) milk chocolate chips and the remaining 1 cup (50g) mini marshmallows. Stir until evenly distributed. Don’t overmix or the chocolate will melt completely—some chunks are good!
- Transfer to the pan: Scrape the mixture into the prepared pan. Use a greased spatula (or clean hands) to gently press into an even layer. Don’t pack too tightly—this keeps the bars chewy.
- Top it off (optional): Sprinkle a few extra chocolate chips or marshmallows on top for a dramatic finish. Press lightly so they stick.
- Let set: Allow bars to cool at room temperature for 30–45 minutes, or pop in the fridge for 15 minutes if you’re in a hurry. Bars should feel firm but still slightly springy when pressed.
- Cut and serve: Lift bars out using the parchment overhang. Cut into squares (big or small, your call!). Wipe the knife between cuts for clean edges.
Troubleshooting tips: If bars are too sticky to cut, chill them longer. If they’re crumbly, you may need a bit more melted marshmallow or butter next time. Sometimes, humidity can make marshmallows extra gooey—just let them firm up a bit longer.
Personal tip: I always save a corner piece for myself—the extra caramelized marshmallow bits are the best!
Cooking Tips & Techniques
Here’s what I’ve learned after a dozen batches (and a few sticky mishaps):
- Don’t overheat the marshmallows: They melt fast! If you microwave too long, they get tough and lose their gooey magic. Short bursts are best.
- Mix quickly but gently: Once the cereal goes in, move fast. The marshmallow mixture sets up quickly. If you wait, it’ll get lumpy and tough to spread.
- Use greased utensils: Marshmallows love to stick—spray your spatula or spoon with a little oil or butter. It makes spreading way easier.
- Don’t press too hard: Gently pat the mixture into the pan. Packing it down makes bars dense and hard to bite.
- Let bars cool fully: Patience pays off. Bars cut neater and taste better when they’ve had time to set.
Honestly, my first batch was a sticky disaster because I tried to rush everything! Lesson learned: slow down when folding in the cereal and chocolate. If the chocolate chips start melting too much, toss them in the freezer for a few minutes before adding. That keeps them chunky and gives you those dreamy chocolate pockets.
If you’re multitasking (like, wrangling kids while making dessert), pre-measure everything. Having ingredients ready means less stress and quicker assembly. And don’t worry if your bars look a little rustic—those jagged edges and marshmallow swirls are part of the charm!
Variations & Adaptations
Golden Grahams S’mores Bars are super flexible. Here are a few ways to make them your own:
- Peanut Butter S’mores Bars: Swirl ½ cup (130g) creamy peanut butter into the melted marshmallow mixture for a nutty twist. Top with peanut butter chips.
- Seasonal S’mores Bars: In summer, add fresh berries (strawberries or raspberries). For fall, mix in a dash of cinnamon or pumpkin spice. Winter calls for crushed peppermint candies!
- Gluten-Free Version: Use a certified gluten-free graham cereal and gluten-free marshmallows.
- Dairy-Free/Allergy-Friendly: Substitute vegan butter and dairy-free chocolate chips. Vegan marshmallows work great, too.
- Extra Chocolate: Drizzle melted chocolate over the cooled bars for a bakery-style look.
For different textures, try swapping Golden Grahams for Cinnamon Toast Crunch or Rice Chex. If you love salty-sweet combos, sprinkle a bit of flaky sea salt on top right after pressing the mixture into the pan.
My personal favorite? Mixing in a handful of chopped roasted almonds for crunch and protein. Feel free to get creative—the base recipe is super forgiving, and the results are always delicious!
Serving & Storage Suggestions
Golden Grahams S’mores Bars are best served at room temperature—the chocolate is soft, and the marshmallows are perfectly chewy. For parties, cut into small squares and pile on a platter. If you’re feeling fancy, dust lightly with powdered sugar or drizzle with extra chocolate.
Pairing ideas: Serve with cold milk, hot cocoa, or iced coffee. For dessert tables, pair with fresh fruit or salty pretzels for balance.
Storage: Bars keep well at room temperature in an airtight container for up to 4 days. If your kitchen is hot, refrigerate to prevent melting. For longer storage, wrap individual bars in plastic and freeze for up to 2 months. Thaw at room temp before eating—flavors actually deepen overnight!
Reheat gently in the microwave (just 5–10 seconds) if you like melty chocolate. Pro tip: These bars travel well and make awesome lunchbox treats. Just wrap tightly so they don’t stick together.
Nutritional Information & Benefits
Estimated per serving (1 bar, based on 24 bars):
- Calories: ~160
- Fat: 6g
- Carbohydrates: 26g
- Protein: 2g
- Sugar: 15g
Golden Grahams cereal provides some whole grain goodness, while marshmallows and chocolate offer quick energy. If you opt for dark chocolate or add nuts, you’ll sneak in antioxidants and healthy fats. This recipe can be made gluten-free or dairy-free as needed—just swap in appropriate products.
Potential allergens: wheat (cereal), dairy (butter, chocolate chips), and gelatin (marshmallows). Always check labels if serving to guests with allergies. I love that these bars satisfy sweet cravings in moderate portions—perfect for a balanced treat without overdoing it!
Conclusion
If you’ve ever dreamed of having s’mores in your lunchbox—or just want a fast, fun dessert—Golden Grahams S’mores Bars are the answer. They’re easy, nostalgic, and totally customizable. Whether you follow the classic recipe or try a wild variation, you’re in for a treat that’s both comforting and exciting.
I keep coming back to these bars because they’re the kind of recipe everyone can make (and everyone loves). You don’t need fancy skills, just a love of chocolate and marshmallow. So go ahead, make them your own—add a twist, share with friends, and enjoy every sticky, crunchy bite.
If you try this recipe, let me know in the comments below! Did your kids love it? Did you sneak an extra piece after bedtime? Tag me if you post on Pinterest—I can’t wait to see your creations. Happy snacking!
FAQs
Can I make Golden Grahams S’mores Bars ahead of time?
Absolutely! These bars set up quickly and stay fresh for several days in an airtight container. Make them a day ahead for parties or school lunches.
What if I don’t have Golden Grahams cereal?
No worries! You can swap in other graham-flavored cereals, Cinnamon Toast Crunch, or even Rice Chex for a different vibe.
Can I freeze these bars?
Yes! Wrap individual bars tightly in plastic and freeze for up to 2 months. Thaw at room temperature before serving.
How do I keep the bars from sticking to the pan?
Lining your pan with parchment paper or nonstick foil makes lifting and cutting super easy. Lightly greasing also helps.
Are Golden Grahams S’mores Bars gluten-free or dairy-free?
The classic recipe isn’t, but you can easily adapt it by using gluten-free cereal, vegan marshmallows, and dairy-free butter/chocolate chips.
Pin This Recipe!
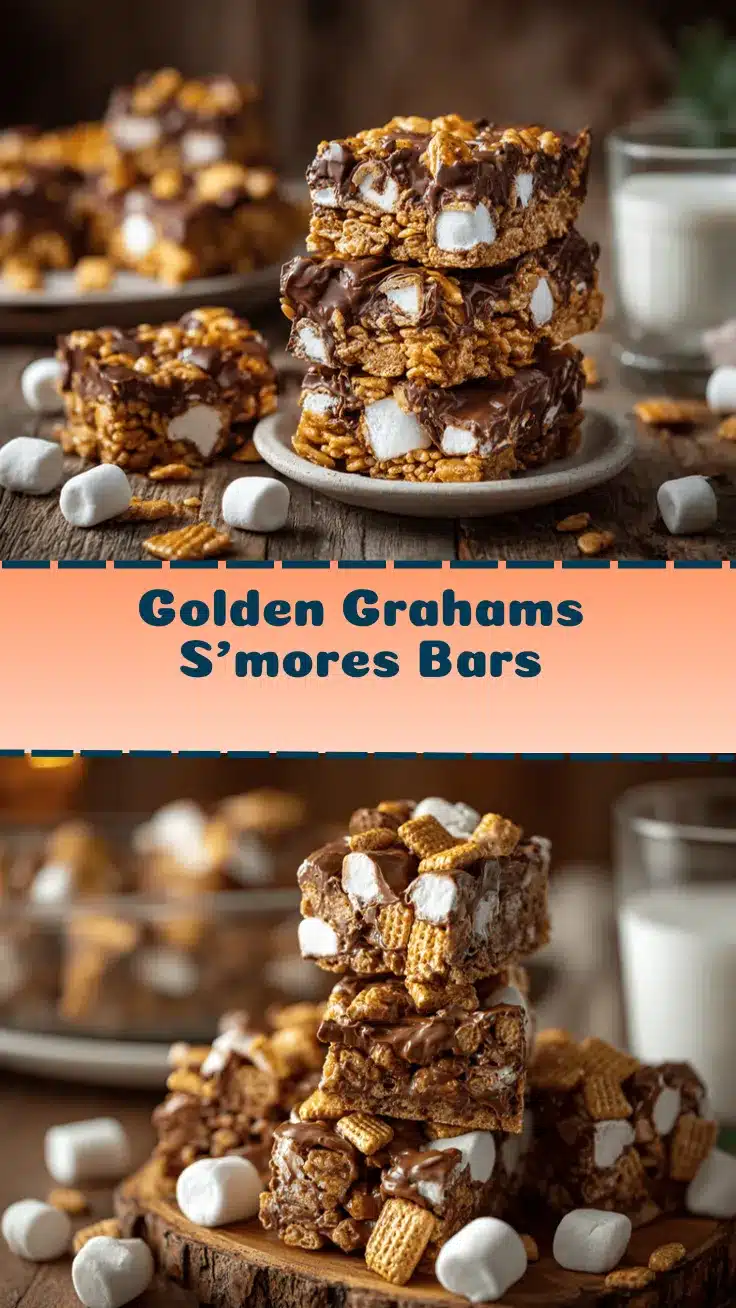

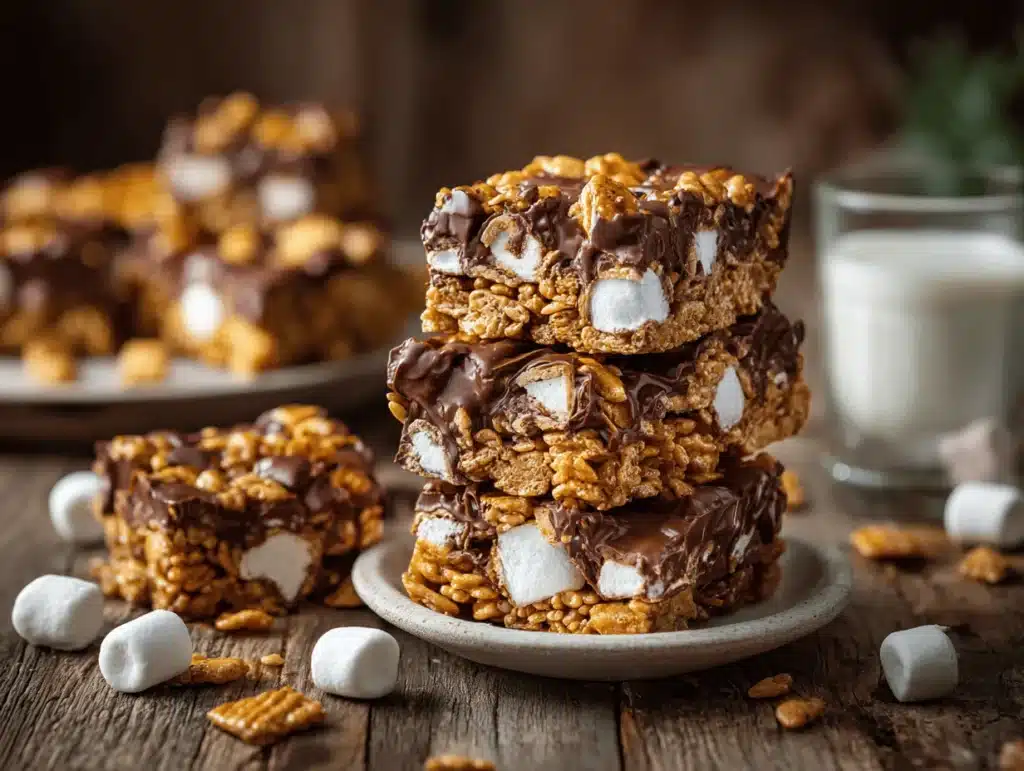
Golden Grahams S’mores Bars
- Total Time: 30 minutes
- Yield: 24 bars 1x
Description
Golden Grahams S’mores Bars are a quick, no-bake dessert that captures classic campfire flavors with crunchy cereal, gooey marshmallows, and melty chocolate. Perfect for parties, lunchboxes, or a nostalgic treat any time of year.
Ingredients
- 6 cups Golden Grahams cereal (about 180g)
- 5 cups mini marshmallows (about 250g), divided
- 1 1/2 cups milk chocolate chips (about 260g)
- 1/4 cup unsalted butter (about 60g)
- 1 teaspoon vanilla extract
- Pinch of salt (optional)
- Optional: peanut butter chips, dark chocolate chunks, dairy-free butter, gluten-free graham cereal, extra mini marshmallows for topping
Instructions
- Line a 9×13-inch pan with parchment paper or nonstick foil, leaving an overhang for easy lifting. Lightly grease if needed.
- In a large microwave-safe bowl, combine butter and 4 cups mini marshmallows. Microwave in 30-second bursts, stirring each time, until melted and smooth (about 1.5–2 minutes). Alternatively, melt over low heat on the stovetop, stirring constantly.
- Stir in vanilla extract and a pinch of salt until the mixture is glossy.
- Quickly fold in Golden Grahams cereal, stirring gently but thoroughly to coat without crushing.
- Add chocolate chips and the remaining 1 cup mini marshmallows. Stir until evenly distributed, but don’t overmix.
- Scrape the mixture into the prepared pan. Use a greased spatula or clean hands to gently press into an even layer without packing too tightly.
- Sprinkle extra chocolate chips or marshmallows on top if desired, pressing lightly.
- Let bars cool at room temperature for 30–45 minutes, or refrigerate for 15 minutes until firm but slightly springy.
- Lift bars out using the parchment overhang. Cut into squares, wiping the knife between cuts for clean edges.
Notes
Don’t overheat marshmallows; mix quickly but gently once cereal is added. Use greased utensils for easier spreading. Bars cut best when fully cooled. For allergy-friendly or gluten-free versions, substitute appropriate products. Store in an airtight container at room temperature for up to 4 days, or freeze for up to 2 months.
- Prep Time: 10 minutes
- Cook Time: 5 minutes
- Category: Dessert
- Cuisine: American
Nutrition
- Serving Size: 1 bar
- Calories: 160
- Sugar: 15
- Sodium: 90
- Fat: 6
- Saturated Fat: 3
- Carbohydrates: 26
- Fiber: 1
- Protein: 2
Keywords: s'mores bars, golden grahams, no bake dessert, kid friendly, marshmallow, chocolate, easy recipe, party treat, lunchbox snack