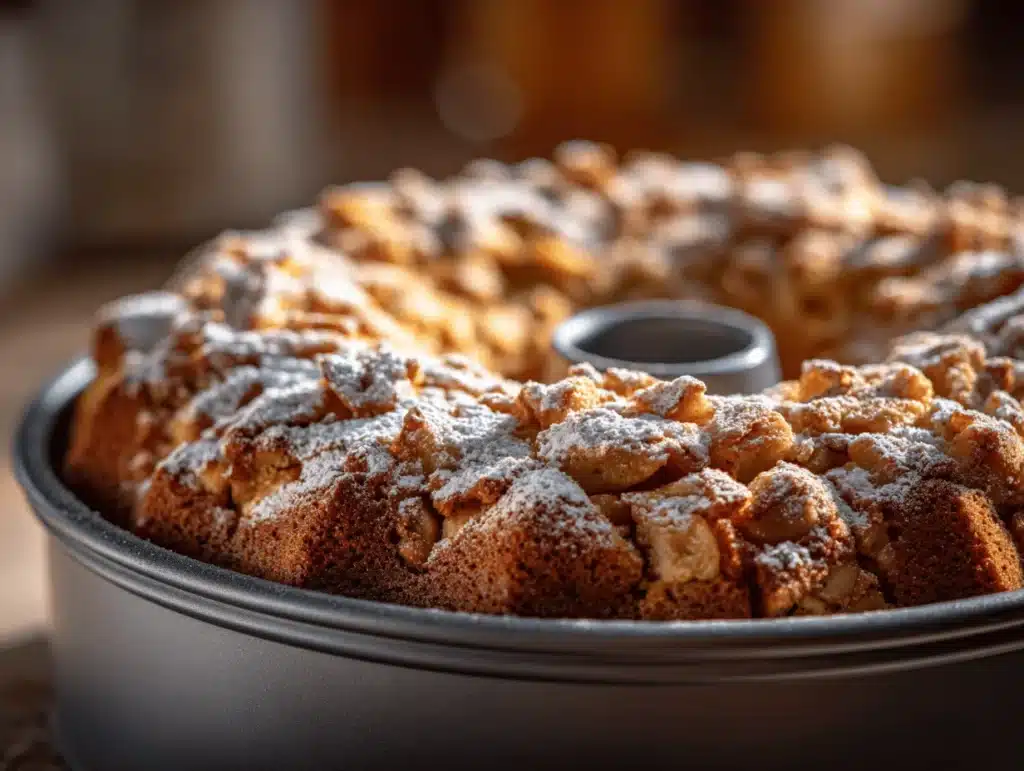
The scent of warm apples and cinnamon wafting through my kitchen always makes me pause—honestly, it’s pure nostalgia in a baking dish. The first time I made this Jewish apple cake recipe, I was standing in my grandma’s kitchen, flour dust swirling, her laughter filling the air. She swore by simple ingredients and generous helpings of caramelized apples. I didn’t know it then, but this would become the kind of dessert my friends request all autumn long. It’s more than just an easy homemade dessert; it’s comfort, tradition, and pure apple bliss packed into every slice.
Jewish apple cake has a fascinating backstory. Traditionally, it’s made without dairy, perfect for serving alongside any meal. Over time, I’ve tweaked the recipe, boosting the apple count and adding that golden caramelization for extra depth—because, let’s face it, caramelized apples make everything better. If you love homemade cakes that are moist, tender, and bursting with fruit, this one will win your heart. When you slice through the golden-brown crust, you’ll find layers of sweet apples tucked inside, each bite a mix of cinnamon warmth and a subtle tang from fresh fruit.
This Jewish apple cake recipe is a lifesaver for busy families (it’s quick to assemble), for anyone who loves desserts but wants something with a little wholesome flair, and for those days when you just want to bake something special. I’ve tested this recipe a dozen times—sometimes with Granny Smiths, sometimes with Honeycrisps—and it never fails to impress. Whether you’re baking for a holiday, a potluck, or just a cozy afternoon, you’ll love how easy and rewarding this cake is. Let’s dig in!
Why You’ll Love This Recipe
I can say with all my baking experience that this Jewish apple cake recipe is a keeper. I’ve tried countless versions—some too dry, others too dense—but this one nails that perfect balance of moist crumb and caramelized apple goodness. Here’s why you’ll become obsessed with it:
- Quick & Easy: You can prep and pop this cake in the oven in under 20 minutes. No complicated steps, no waiting around.
- Simple Ingredients: Everything you need is probably already in your pantry or fridge. Apples, flour, sugar, eggs—nothing fancy or hard to find.
- Perfect for Any Occasion: Whether it’s brunch, a holiday dinner, or just a weekend treat, this Jewish apple cake recipe fits right in. I love serving it for Rosh Hashanah, but honestly, it’s just as good for a rainy Sunday afternoon.
- Crowd-Pleaser: Kids love the sweet apple chunks, adults appreciate the subtle spice and moist texture. It’s one of those cakes everyone asks for seconds of.
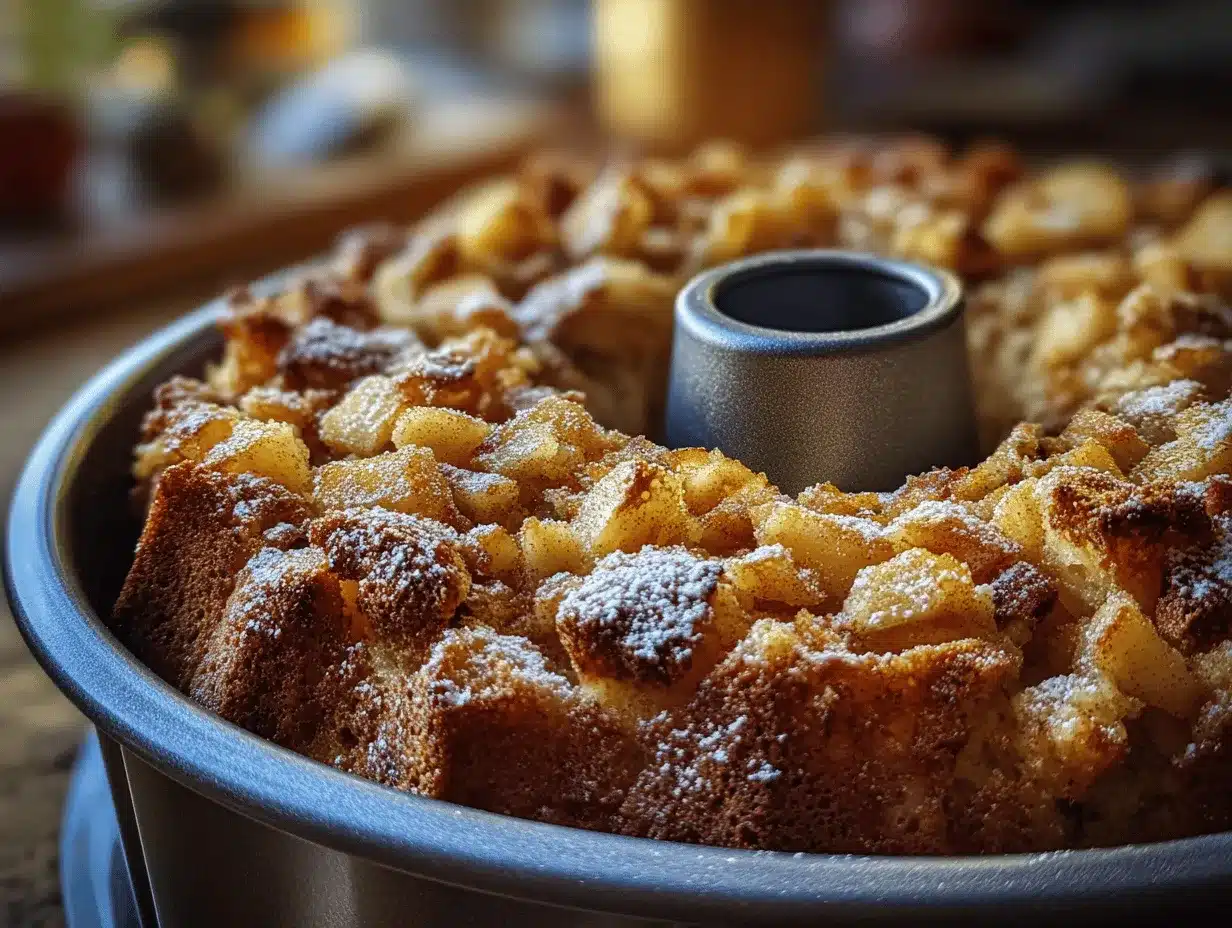
- Unbelievably Delicious: The caramelized apples take it up a notch. The top gets beautifully golden and crisp, while the inside stays soft and packed with fruit.
What sets this cake apart? I blend the apples with a sprinkle of cinnamon and sugar before layering them in, then bake for just the right amount of time so the edges caramelize without drying out the crumb. It’s not just another apple cake—it’s the one I reach for when I want guaranteed smiles. The recipe’s dairy-free base makes it a winner for anyone with dietary restrictions, and the extra apples mean every slice is juicy and full of flavor.
I’ve served this cake to picky eaters, lifelong apple lovers, and even those who “don’t do dessert”—and every time, it’s met with rave reviews. If you want a dessert that’s comforting, impressive, and totally doable, this Jewish apple cake recipe is your new go-to. I promise, it’s the kind of cake that makes you close your eyes after the first bite, savoring all those sweet caramelized layers.
Ingredients Needed
This Jewish apple cake recipe keeps things simple but doesn’t skimp on flavor. The ingredients work together to create a cake that’s moist, slightly spiced, and loaded with caramelized apples. Here’s what you’ll need:
- For the Cake Batter:
- 2 1/2 cups (312g) all-purpose flour (sifted for best texture)
- 2 cups (400g) granulated sugar
- 1 tablespoon baking powder
- 1/2 teaspoon salt
- 1 cup (240ml) vegetable oil (neutral flavor, like canola or sunflower)
- 4 large eggs, room temperature
- 1/4 cup (60ml) orange juice (fresh-squeezed is amazing, but bottled works too)
- 2 teaspoons vanilla extract
- For the Caramelized Apples:
- 4 large apples, peeled, cored, and sliced thin (Granny Smith or Honeycrisp preferred)
- 1/2 cup (100g) granulated sugar
- 2 teaspoons ground cinnamon
- 1 tablespoon lemon juice (keeps apples bright and adds a subtle tang)
- 2 tablespoons unsalted butter or margarine (for caramelizing; use margarine if keeping dairy-free)
Ingredient Notes: Use firm, tart apples—a mix of Granny Smith and Fuji works wonders. Orange juice adds a gentle citrus note that keeps the cake fresh and balances the sweetness. If you’re avoiding eggs, you can swap in flax eggs (1 tablespoon ground flaxseed + 3 tablespoons water per egg). For gluten-free, substitute a cup-for-cup gluten-free flour blend. I’ve used Bob’s Red Mill with great results.
Substitution Tips: If you don’t have orange juice, apple juice or milk (dairy or non-dairy) works in a pinch, though it’ll change the flavor slightly. Vegetable oil keeps the cake moist without overpowering the apples, but you can use melted coconut oil for a hint of tropical flavor. For the sugar, swap half for light brown sugar if you like a deeper caramel taste. If you’re short on cinnamon, pumpkin pie spice makes an interesting twist.
Brand Shout-Out: I love King Arthur flour for its consistency and Bob’s Red Mill for gluten-free options. For apples, pick what’s freshest at your local market—the more fragrant, the better. Honestly, this Jewish apple cake recipe is flexible, so don’t stress if you need to substitute here or there. The apples are the star, so focus on choosing ones that are crisp and flavorful.
Equipment Needed
You don’t need any fancy gear for this Jewish apple cake recipe, which is part of its charm. Here’s what I reach for every time:
- 10-inch tube pan (classic for Jewish apple cake; you can use a bundt pan if needed—just grease well!)
- Mixing bowls (one large for batter, one medium for apples)
- Whisk and spatula (whisk for batter, spatula for layering apples)
- Peeler and corer (makes prepping apples quick—if you don’t have these, a sharp paring knife works fine)
- Nonstick spray or parchment paper (for lining the pan)
- Kitchen scale (optional, but I use it for precise measurements—especially flour)
If you’ve only got a regular round cake pan, go for a 9-inch with tall sides. Just reduce the baking time slightly and watch for doneness. My grandma used an old aluminum tube pan that lasted decades—these last forever if you wash them gently and avoid scratching. For budget-friendly options, check thrift shops or online marketplaces; you really don’t need to splurge.
Maintenance tip: After baking, soak your pan with warm water and a little soap, then use a soft sponge to avoid scratching. If you’re using nonstick, skip the steel wool. I’ve learned the hard way that rough cleaning will ruin that easy release in no time!
Preparation Method
Ready to bake? Here’s my tried-and-true method for this irresistible Jewish apple cake recipe, step by step:
- Prepare the Apples: Peel, core, and slice 4 large apples (about 800g). Toss the slices with 1/2 cup (100g) sugar, 2 teaspoons cinnamon, 1 tablespoon lemon juice. In a skillet, melt 2 tablespoons butter or margarine over medium heat. Add apple mixture, sauté for 5–7 minutes until apples are soft and sugar caramelizes. Let cool slightly. (Sensory cue: Apples should be golden, fragrant, and slightly sticky.)
- Preheat the Oven: Set oven to 350°F (175°C). Grease a 10-inch tube pan generously with nonstick spray or line with parchment paper for easy release. (Tip: Double-check the pan’s crevices to prevent sticking!)
- Mix Dry Ingredients: In a large bowl, whisk together 2 1/2 cups (312g) flour, 2 cups (400g) sugar, 1 tablespoon baking powder, and 1/2 teaspoon salt. (Troubleshooting: Sift flour if you notice clumps—makes for a lighter cake.)
- Combine Wet Ingredients: In a separate bowl, whisk together 1 cup (240ml) oil, 4 eggs, 1/4 cup (60ml) orange juice, and 2 teaspoons vanilla extract. (Tip: Eggs should be room temperature for best mixing.)
- Make the Batter: Pour wet ingredients into dry ingredients. Stir with a spatula until just combined—don’t overmix, or the cake may get tough. (Batter should be thick but pourable, pale yellow in color.)
- Layer Batter and Apples: Pour one-third of the batter into the prepared pan. Add half of the caramelized apples in an even layer. Repeat with another third of the batter, then the rest of the apples, finishing with the final third of batter. (Personal tip: Use a spatula to gently spread batter over apples; it doesn’t have to be perfect!)
- Bake: Place pan on center rack. Bake for 1 hour 15 minutes to 1 hour 25 minutes. Check for doneness—insert a toothpick in the center, it should come out mostly clean with moist crumbs. (Watch for golden, slightly crisp top and bubbling edges.)
- Cool & Unmold: Let cake cool in the pan for 20 minutes. Run a knife around the edges, invert carefully onto a wire rack. Cool completely before slicing. (Warning: If unmolded too soon, cake may break—patience pays off.)
- Slice & Serve: Cut into thick slices and enjoy! (Extra tip: Wipe knife between cuts for tidy slices.)
If your cake cracks on top, don’t worry—it’s normal and actually adds rustic charm! Sometimes, apples sink a bit; that just means you packed in lots of fruit. If the cake looks pale after an hour, leave it for another 10 minutes. Every oven is a little different, so use your senses along with the timer.
Cooking Tips & Techniques
I’ve baked dozens of apple cakes, and here are some lessons learned from all those trials (and a few flops!).
- Use Firm Apples: Soft or mealy apples turn mushy. Stick to firm varieties like Granny Smith, Fuji, or Honeycrisp—they hold up and caramelize beautifully.
- Caramelize, Don’t Burn: When sautéing apples, medium heat is key. Stir often and stop as soon as they start browning and smelling sweet. Burnt apples = bitter cake.
- Don’t Overmix Batter: Stir just until you see no dry flour. Overmixing leads to tough cake (learned this the hard way—one batch was almost bread!).
- Check Doneness Early: Every oven runs a little different. Start checking at 1 hour 10 minutes; a toothpick with moist crumbs means it’s ready. If it’s gooey, give it 5-10 more minutes.
- Layering for Maximum Apple: Spread apples evenly for every bite to be packed with fruit. If you pile too many in one spot, the cake may collapse—so keep layers even.
- Pan Prep Matters: Grease all nooks and crannies! I once skipped a corner and spent 10 minutes prying out broken cake bits. Parchment helps with tricky pans.
- Let It Cool: It’s tempting to slice right in, but cooling helps set the crumb and keeps slices neat.
If you want to multitask, prep apples while dry ingredients are measured. For consistent results, use a kitchen scale. If you’re baking in a bundt pan, watch the top for browning—cover loosely with foil if it gets too dark before the cake’s done. Trust me, little details make a world of difference.
Variations & Adaptations
One of the best things about this Jewish apple cake recipe is how flexible it is. Here are some fun twists I’ve tried, along with tips for adapting it to fit your needs:
- Gluten-Free: Swap all-purpose flour for a cup-for-cup gluten-free blend. Bob’s Red Mill or King Arthur’s gluten-free flour works great—texture stays moist, flavor’s the same.
- Vegan: Replace eggs with flax eggs (1 tablespoon ground flaxseed + 3 tablespoons water per egg, soak for 5 min). Use dairy-free margarine for caramelizing apples.
- Seasonal Fruit: In spring, swap half the apples for pears. In summer, try adding fresh berries (blueberries are a tasty match!).
- Nuts & Raisins: Add 1/2 cup (60g) chopped walnuts or pecans to the batter for crunch, or toss in a handful of golden raisins with the apples.
- Spice It Up: If you like extra warmth, add 1/2 teaspoon ground ginger or nutmeg to the apple mixture.
- Different Cooking Methods: Bake as muffins—divide batter into lined muffin tins, bake at 350°F (175°C) for 25–30 minutes.
I’ve tried the berry variation and loved how the tartness balanced the sweet apples. If you’re allergic to nuts, skip them—this cake stands strong on its own. For a lower-sugar option, reduce sugar by 1/4 cup; the apples still provide plenty of sweetness. Honestly, this Jewish apple cake recipe is forgiving, so don’t be afraid to experiment!
Serving & Storage Suggestions
This cake shines when served slightly warm, but it’s just as delicious at room temperature. For a cozy presentation, dust the top with powdered sugar or drizzle with a simple glaze (mix 1 cup powdered sugar with 2 tablespoons orange juice). Slice thick and serve with coffee, tea, or even a scoop of vanilla ice cream.
If you’re hosting brunch, pair with a savory egg dish and fresh fruit salad. For dessert, a chilled glass of Moscato or spiced cider complements those caramelized apple notes perfectly.
To store, wrap leftover cake tightly in plastic wrap or foil and keep in the refrigerator up to 5 days. For longer storage, slice and freeze individual pieces—just thaw overnight at room temp or microwave for 30 seconds to soften. If reheating the whole cake, warm in a 300°F (150°C) oven for 10 minutes (cover loosely with foil to prevent drying).
Here’s a tip: the flavors deepen after a day or two, so leftovers are even better! The apples keep it moist, so you won’t end up with a dry crumb. I’ve even packed slices for lunchbox treats—still delicious hours later.
Nutritional Information & Benefits
Each slice of this Jewish apple cake recipe packs roughly 320 calories, with about 6g protein, 12g fat, and 48g carbohydrates (based on 12 servings). The apples provide fiber, vitamin C, and antioxidants, while eggs and oil give the cake its rich texture and lasting moisture.
This cake is naturally dairy-free, making it a great choice for those with lactose intolerance. For gluten-free diets, swap the flour as noted. If you’re watching sugar, you can use a sugar substitute or reduce by 1/4 cup—apples naturally sweeten the cake. The eggs add protein, and using vegetable oil keeps saturated fat relatively low.
Allergens to note: contains eggs and wheat (unless adapted). If you’re nut-free, skip any optional additions. I love how this cake fits into a balanced lifestyle—one slice is satisfying, and you get that fruit boost too!
Conclusion
If you’re craving a dessert that’s simple, comforting, and absolutely packed with flavor, this Jewish apple cake recipe is your answer. It’s easy enough for a weeknight, impressive enough for special occasions, and flexible for almost any dietary need. Every bite is bursting with caramelized apples, warm spices, and that irresistible homemade touch.
I’ve made this cake for family gatherings, holiday celebrations, and just because I had too many apples lying around. It never disappoints! Give it a try, make it your own, and don’t be afraid to play with the flavors. There’s no wrong way—just your way.
Share your baking adventures in the comments below, or tag me with your cake photos (I love seeing your twists and tweaks!). If you enjoyed this recipe, pass it along to a friend or pin it for later. Happy baking—and here’s to sweet moments and great cake!
Frequently Asked Questions
Can I use different apples in this Jewish apple cake recipe?
Absolutely! Granny Smith, Honeycrisp, Fuji, or Gala all work well. Just pick apples that are firm so they caramelize without turning mushy.
Can I make this cake ahead of time?
Yes! The flavors actually deepen after a day. Bake, cool, and store tightly wrapped. It stays fresh in the fridge for up to 5 days.
Is this Jewish apple cake recipe dairy-free?
Yes, the traditional recipe uses oil instead of butter and no milk, making it dairy-free. Just use margarine instead of butter for caramelizing apples if needed.
How do I prevent the cake from sticking to the pan?
Grease the pan very well, especially all the crevices. You can also line the bottom with parchment paper for easy release.
Can I freeze this cake?
Sure! Slice and wrap individual pieces tightly. Freeze up to 2 months. Thaw overnight or microwave for a quick treat any time.
Pin This Recipe!
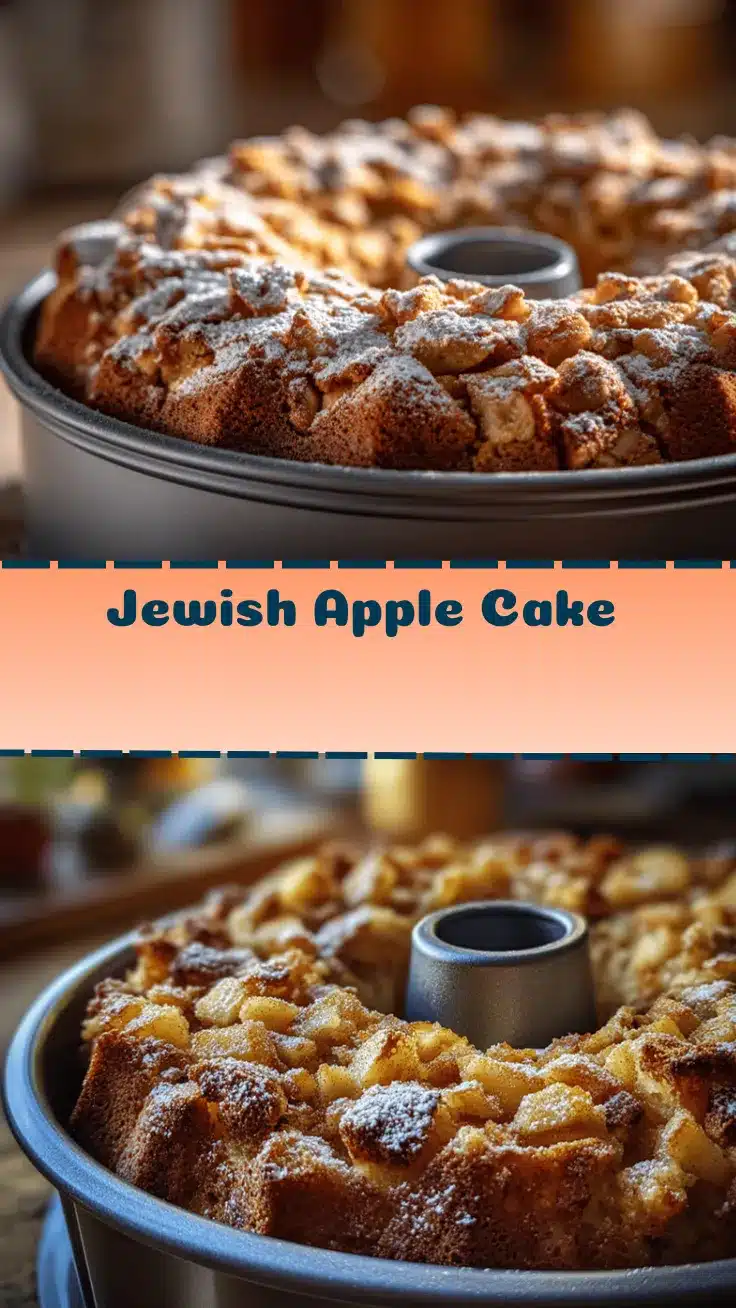

Jewish Apple Cake Recipe Easy Homemade Dessert Packed with Caramelized Apples
- Total Time: 1 hour 40 minutes
- Yield: 12 servings 1x
Description
This easy Jewish apple cake is a nostalgic, dairy-free dessert packed with caramelized apples and warm cinnamon. Moist, tender, and bursting with fruit, it’s perfect for holidays, potlucks, or cozy afternoons.
Ingredients
- 2 1/2 cups all-purpose flour, sifted
- 2 cups granulated sugar
- 1 tablespoon baking powder
- 1/2 teaspoon salt
- 1 cup vegetable oil (canola or sunflower)
- 4 large eggs, room temperature
- 1/4 cup orange juice
- 2 teaspoons vanilla extract
- 4 large apples (Granny Smith or Honeycrisp), peeled, cored, and sliced thin
- 1/2 cup granulated sugar (for apples)
- 2 teaspoons ground cinnamon
- 1 tablespoon lemon juice
- 2 tablespoons unsalted butter or margarine (for caramelizing; use margarine for dairy-free)
Instructions
- Peel, core, and slice 4 large apples. Toss with 1/2 cup sugar, 2 teaspoons cinnamon, and 1 tablespoon lemon juice.
- Melt 2 tablespoons butter or margarine in a skillet over medium heat. Add apple mixture and sauté for 5–7 minutes until soft and caramelized. Let cool slightly.
- Preheat oven to 350°F (175°C). Grease a 10-inch tube pan or line with parchment paper.
- In a large bowl, whisk together flour, sugar, baking powder, and salt.
- In a separate bowl, whisk together oil, eggs, orange juice, and vanilla extract.
- Pour wet ingredients into dry ingredients and stir until just combined.
- Pour one-third of the batter into the prepared pan. Add half of the caramelized apples in an even layer. Repeat with another third of the batter, then the rest of the apples, finishing with the final third of batter.
- Bake for 1 hour 15 minutes to 1 hour 25 minutes, until a toothpick inserted in the center comes out mostly clean with moist crumbs.
- Let cake cool in the pan for 20 minutes. Run a knife around the edges, invert onto a wire rack, and cool completely before slicing.
- Slice and serve. Optionally, dust with powdered sugar or drizzle with a simple glaze.
Notes
Use firm apples like Granny Smith or Honeycrisp for best texture. Sift flour for a lighter crumb. Don’t overmix the batter to keep the cake tender. Grease the pan thoroughly to prevent sticking. The cake is flexible—try gluten-free flour, vegan swaps, or add nuts and raisins for variation. Flavors deepen after a day, making leftovers even better.
- Prep Time: 20 minutes
- Cook Time: 1 hour 20 minutes
- Category: Dessert
- Cuisine: Jewish, American
Nutrition
- Serving Size: 1 slice (1/12 of cake)
- Calories: 320
- Sugar: 30
- Sodium: 180
- Fat: 12
- Saturated Fat: 2
- Carbohydrates: 48
- Fiber: 3
- Protein: 6
Keywords: Jewish apple cake, dairy-free dessert, caramelized apples, easy cake recipe, autumn baking, holiday dessert, apple cake, traditional cake, moist cake, cinnamon apple cake