Sticky fingers, tart apples, and gooey caramel—just thinking about it makes me smile. The first time I made caramel apple slices on a stick, it was for my niece’s autumn birthday party. I was knee-deep in party prep, searching for something fun, easy, and (let’s be honest) less messy than whole caramel apples. That’s when the idea hit: why not slice the apples, skewer them, and dip each piece? The result: blissful bites that are way more shareable and less likely to roll off a plate. Caramel apple slices on a stick have quickly become my go-to for autumn gatherings, lazy movie nights, and even family game night snacks. You get all the nostalgia and comfort of classic caramel apples, but in a format that’s instantly kid-approved and party-friendly.
If you’ve ever found yourself frustrated by wrestling with a sticky, oversized apple, this recipe is a game-changer. It’s perfect for busy families and anyone who loves a sweet treat that’s both convenient and totally customizable. I’ve tested (and tasted!) these caramel apple slices more times than I can count, and I’ve played around with toppings, dipping techniques, even the type of caramel. Whether you’re prepping for a big autumn bash or just want to brighten up a rainy weekend, these slices are a surefire hit. Trust me—once you try caramel apple slices on a stick, you’ll wonder why you ever fussed with the whole apple version.
Plus, there’s something magical about the way tart apples mingle with buttery caramel and crunchy toppings. It’s the kind of snack that gets people talking (and reaching for more). So grab your apples and skewers—let’s make autumn extra sweet with irresistible caramel apple slices on a stick!
Why You’ll Love This Recipe
After years of hosting autumn parties and countless caramel apple fails (the kind where caramel slides right off), I can confidently say this recipe is a total crowd-pleaser. Here’s why you’ll fall in love with caramel apple slices on a stick:
- Quick & Easy: Ready in under 30 minutes, so you’re not stuck in the kitchen while guests arrive.
- Simple Ingredients: Apples, caramel, toppings—nothing complicated, and you probably already have most of it.
- Perfect for Parties: These slices make a gorgeous autumn party tray—no sticky hands, no forks needed. Kids and grown-ups devour them!
- Customizable: Pick your favorite toppings—mini chocolate chips, crushed pretzels, chopped nuts, or sprinkles. Everyone gets their favorite flavor combo.
- Less Mess: The stick keeps everything neat, so you won’t be scrubbing caramel off your table later.
- Kid-Friendly: Smaller slices mean smaller bites—much safer and easier for little mouths.
- Healthier Option: Fresh apples are the star, and you control how much caramel goes on each piece.
What makes my caramel apple slices on a stick different? Well, I always blend store-bought caramel with a splash of cream for a silkier texture that actually sticks. Plus, I chill the apple slices before dipping—learned that trick after a few runny caramel disasters. You can even prep everything ahead of time and assemble right before serving.
This isn’t just another autumn snack—it’s the kind of treat that makes people smile, brings back cozy memories, and gives you a little taste of fall magic. I love watching guests’ eyes light up when they see the tray. It’s simple, but it just works. If you’re looking for a fun, fail-proof way to celebrate the season, caramel apple slices on a stick are your answer!
Ingredients Needed
You don’t need a fancy pantry for caramel apple slices on a stick—just a handful of basics. Here’s what you’ll need to whip up the perfect party tray:
- Apples (4 medium, any tart variety): Granny Smith, Honeycrisp, or Fuji work best. Tart apples keep things from getting too sweet.
- Caramel (1 cup, store-bought or homemade): I prefer Kraft caramels melted with a splash of heavy cream (about 2 tablespoons) for smoothness. Dulce de leche also works—just heat gently.
- Lemon juice (2 tablespoons): Keeps apples from browning and adds a little zing.
- Wooden sticks or popsicle sticks (16-20): Skewers work too, but popsicle sticks are easier for little hands.
- Toppings (choose 2-4):
- Mini chocolate chips
- Chopped peanuts or pecans
- Crushed pretzels
- Rainbow sprinkles
- Toasted coconut flakes
- Graham cracker crumbs
- Optional:
- Sea salt flakes (for a gourmet twist)
- Melted white or dark chocolate (for drizzling)
- Peanut butter or almond butter (thin with a touch of milk if you want to drizzle)
I usually grab Granny Smith apples for their tartness, but if you’re serving kids or want something sweeter, Honeycrisp is amazing. For caramel, the classic cellophane-wrapped squares melt perfectly—just add a little cream so it glides over the apples instead of clumping. If you’re feeling adventurous, try making homemade caramel (but honestly, the store-bought shortcut is just fine for this recipe).
For toppings, you can go wild or keep it classic. My personal favorite is chopped pecans and a sprinkle of sea salt—it’s a flavor combo you’ll crave. If you have allergies in the crowd, skip the nuts and opt for pretzels or sprinkles. Want a gluten-free version? Just avoid graham crackers and pretzels, and stick with coconut, nuts, or chocolate chips.
Feel free to play around! In summer, swap in fresh berries or drizzle with berry sauce. For Halloween, orange sprinkles and chocolate drizzle look super festive. This recipe is all about having fun and using what you love.
Equipment Needed
You don’t need a full bakery’s worth of gadgets for caramel apple slices on a stick. Here’s what I use every time:
- Cutting board and sharp knife: For slicing apples evenly. A chef’s knife works best—just watch your fingers!
- Apple corer (optional): Makes removing the core quick and neat. You can skip it, but it does save time.
- Popsicle sticks or wooden skewers: I buy these in bulk online, but craft stores usually carry them. Toothpicks work in a pinch for mini slices.
- Small saucepan: For melting caramel smoothly. Nonstick is easiest to clean (learned the hard way!).
- Microwave-safe bowl (if using microwave): Great for melting store-bought caramel quickly.
- Sheet pan lined with parchment paper: Lets slices cool and set without sticking.
- Small bowls for toppings: Makes dipping and rolling super easy.
If you’re just getting started, don’t worry—regular kitchen knives and any old baking tray are totally fine. Just be sure to line your tray so caramel doesn’t stick. I’ve used everything from fancy apple corers to plastic picnic knives, and honestly, as long as you slice carefully, you’re golden. If you go for reusable sticks, give them a quick wash and dry so caramel doesn’t cling to any old bits. Budget tip: Dollar stores often have popsicle sticks and parchment paper for cheap!
Preparation Method

Let’s get into the nitty-gritty of making caramel apple slices on a stick. I promise, it’s way easier than wrangling whole caramel apples. Here’s my tried-and-true method:
- Prep the apples: Wash and dry 4 medium apples. Cut each apple into 4-5 thick slices (about 1/2-inch or 1.3 cm thick). Remove any seeds and the core from each slice. (Tip: If you have an apple corer, use it first, then slice.) Toss the slices in 2 tablespoons lemon juice to prevent browning.
- Insert sticks: Carefully poke a popsicle stick or wooden skewer into the bottom of each slice. Try to push it in about halfway for a secure hold. If the apple cracks, just try again at a different angle—happens to the best of us!
- Chill: Place apple slices on a parchment-lined baking sheet. Pop them in the fridge or freezer for 10-15 minutes. Chilling helps the caramel stick and sets the slices up for dipping success.
- Melt caramel: In a small saucepan over low heat, combine 1 cup caramel (about 30 Kraft squares) and 2 tablespoons heavy cream. Stir frequently until smooth and glossy, about 5 minutes. (Or microwave in 30-second intervals, stirring every time.) Don’t let it boil—caramel burns quickly!
- Dip and swirl: Remove apple slices from the fridge. Hold each stick and dip the apple slice into caramel, swirling to coat one side. Let excess drip off. If caramel gets too thick, reheat gently.
- Add toppings: Immediately sprinkle or roll caramel-coated side in desired toppings while caramel is still soft. My favorite combo: mini chocolate chips + chopped pecans. Lay each finished slice back on the parchment-lined tray.
- Set and serve: Chill completed slices in the fridge for 10-15 minutes, or until caramel firms up. Serve cold for best crunch and gooeyness.
Troubleshooting: If caramel slides off, chill your apple slices longer or dry them thoroughly. If caramel is too thick, add a splash more cream and reheat gently. If sticks won’t go in, try a thinner slice or twist the stick as you push. Don’t worry if a few slices look wonky—those are “chef’s samples” (my favorite excuse for snacking).
Efficiency tip: Set up a toppings station so you can dip, sprinkle, and repeat without making a mess. I learned this after juggling sticky bowls for years—having it all lined up is a lifesaver. And don’t forget to let the caramel cool slightly before dipping; piping hot caramel can slide right off.
Cooking Tips & Techniques
After making caramel apple slices on a stick for everything from bake sales to family reunions, I’ve picked up a few tricks worth sharing. Here’s my best advice for perfect slices, every single time:
- Chill the apples: This is key! Cold apples help the caramel set quickly and cling better. If you skip this step, caramel might slide right off.
- Use full-fat caramel: Low-fat versions tend to get grainy or separate. Trust me, stick with the classic stuff (or make your own with real butter and sugar).
- Don’t overheat caramel: Caramel burns or hardens fast. Keep the heat low and stir often. If it starts to seize, add a splash of cream and mix gently.
- Slice apples thick: Thin slices can break when you insert the stick or dip in caramel. Aim for about 1/2 inch (1.3 cm)—just thick enough to hold everything together.
- Work quickly: Caramel sets fast, so dip and sprinkle toppings one slice at a time. If you’re making a big batch, get a helper to speed things up.
- Don’t forget parchment paper: Nothing ruins the fun like caramel stuck to a pan. Always use parchment or wax paper on your tray.
I’ve had my share of caramel fails—once, I tried dipping warm apple slices and ended up with a sticky puddle. Another time, I used thin bamboo skewers and half the apples split. Lessons learned: keep it cool, use sturdy sticks, and don’t rush the caramel. If you want perfectly smooth caramel, blend in a little cream or butter. For multitasking, set up your toppings station before you start dipping; it’s way less chaotic.
Consistency tip: If you want every slice to look Pinterest-worthy, let the caramel cool just a bit before dipping. It gets thicker, which means fewer drips and more even coverage. And honestly, don’t stress over imperfections—people love homemade snacks with character!
Variations & Adaptations
One of the best things about caramel apple slices on a stick is how easy they are to adapt. I’m always experimenting with new flavors and toppings—here are some fun ways to make this recipe your own:
- Dietary swaps: For dairy-free, use coconut milk instead of cream and dairy-free caramel (Whole Foods has a great vegan version). For nut-free, skip nuts and try toasted seeds or coconut flakes.
- Seasonal twist: In winter, sprinkle with crushed peppermint candies and drizzle with melted chocolate. In spring, use pastel sprinkles or chopped dried fruit.
- Flavor varieties: Try dipping in white chocolate instead of caramel for a “snowy” look, or blend caramel with peanut butter for a nutty kick.
- Different cooking methods: If you want a baked version, roast the apple slices for 10 minutes at 350°F (175°C) before dipping—makes them extra tender.
- Custom toppings: Let guests create their own—set out bowls of toppings and make it a DIY activity. Kids love it!
- Personal favorite: I once made “s’mores” slices: caramel, mini marshmallows, and crushed graham crackers. They disappeared in minutes.
Don’t be afraid to get creative. If someone has allergies, just swap in safe toppings. If you’re short on time, use pre-sliced apples from the store (just pat them dry before dipping). Want a low-sugar option? Use dark chocolate drizzle instead of caramel. This recipe is all about flexibility and fun!
Serving & Storage Suggestions
Presentation matters—especially for party trays! Here’s how to serve and store caramel apple slices on a stick so they look and taste amazing:
- Serving temp: Serve chilled or at cool room temperature. Straight from the fridge keeps the caramel firm and the apples crisp.
- Party tray ideas: Arrange slices in a fan or circle on a platter. Sprinkle extra toppings around the edge for color. Add a few whole apples for decoration.
- Pairings: These slices are awesome with hot apple cider, coffee, or a big pitcher of autumn punch. For dessert spreads, add brownies, popcorn balls, or pumpkin cookies.
- Storage: Store leftover slices in an airtight container in the fridge for up to 2 days. Place parchment between layers to avoid sticking.
- Freezer: Not recommended—caramel can get sticky and apples turn mushy. But you can freeze plain apple slices for future use.
- Reheating: If needed, let slices sit at room temp for 10-15 minutes to soften caramel. Don’t microwave (caramel melts off).
- Flavor tip: The caramel flavor deepens overnight, so leftovers can taste even better—if you have any!
I love prepping these slices the night before a party. Just keep them chilled and covered. If serving outdoors, keep the tray on ice packs under the platter. And remember, nobody complains about sticky fingers when the treats are this good!
Nutritional Information & Benefits
Caramel apple slices on a stick aren’t just fun—they’re a little bit better for you than the classic whole caramel apple. Here’s a quick look at what you’re eating (per slice, approx.):
| Nutrient | Per Slice (approx.) |
|---|---|
| Calories | 80-110 |
| Carbs | 18-22g |
| Fat | 2-5g |
| Protein | 0.5g |
| Fiber | 1-2g |
Health benefits: Apples are packed with vitamin C, fiber, and antioxidants. By using slices, you get more fruit and less caramel per bite. Plus, you choose your toppings—nuts add protein, coconut offers healthy fats, and dark chocolate brings antioxidants.
Dietary notes: This recipe is naturally gluten-free if you skip graham crackers and pretzels. For vegan, use dairy-free caramel and plant-based toppings. Watch out for nut toppings if there are allergies.
I love that these slices make indulgence feel a little lighter. As someone who tries to balance treats with healthy choices, this recipe fits right in.
Conclusion
If you want an autumn party tray that wows, caramel apple slices on a stick are your ticket. They’re easy, adorable, and totally craveable. From family movie nights to festive gatherings, these sweet bites bring all the cozy vibes of fall, minus the usual sticky mess.
Don’t be afraid to mix and match toppings, swap out apples, or let the kids build their own. That’s the beauty of this recipe—it’s flexible, forgiving, and always a hit. Honestly, I make these every season and never get tired of them. There’s just something special about the mix of crisp apple, warm caramel, and crunchy extras.
So go ahead—give these caramel apple slices on a stick a try! Leave a comment below if you have a favorite topping, or if you came up with a new twist. I love seeing your party trays, so tag me on social media or share your photos. Here’s to sweet memories and sticky smiles this autumn!
Frequently Asked Questions
How do I keep the apples from turning brown?
Toss the apple slices in lemon juice right after cutting—this keeps them bright and fresh for hours.
Can I use homemade caramel for this recipe?
Absolutely! Just make sure it’s thick enough to stick to cold apple slices. I use store-bought when I’m short on time, but homemade tastes amazing.
What are the best apples for caramel apple slices?
Granny Smith and Honeycrisp are my favorites. Tart apples balance out the sweet caramel, but use whatever you love.
How far in advance can I make these for a party?
You can prep everything the night before. Just keep slices chilled and covered in the fridge. Add toppings right after dipping for best results.
Are caramel apple slices on a stick safe for kids?
Yes! The sticks make them easy to hold, and smaller slices are safer than whole apples. Just watch for nut toppings if there are allergies.
Pin This Recipe!
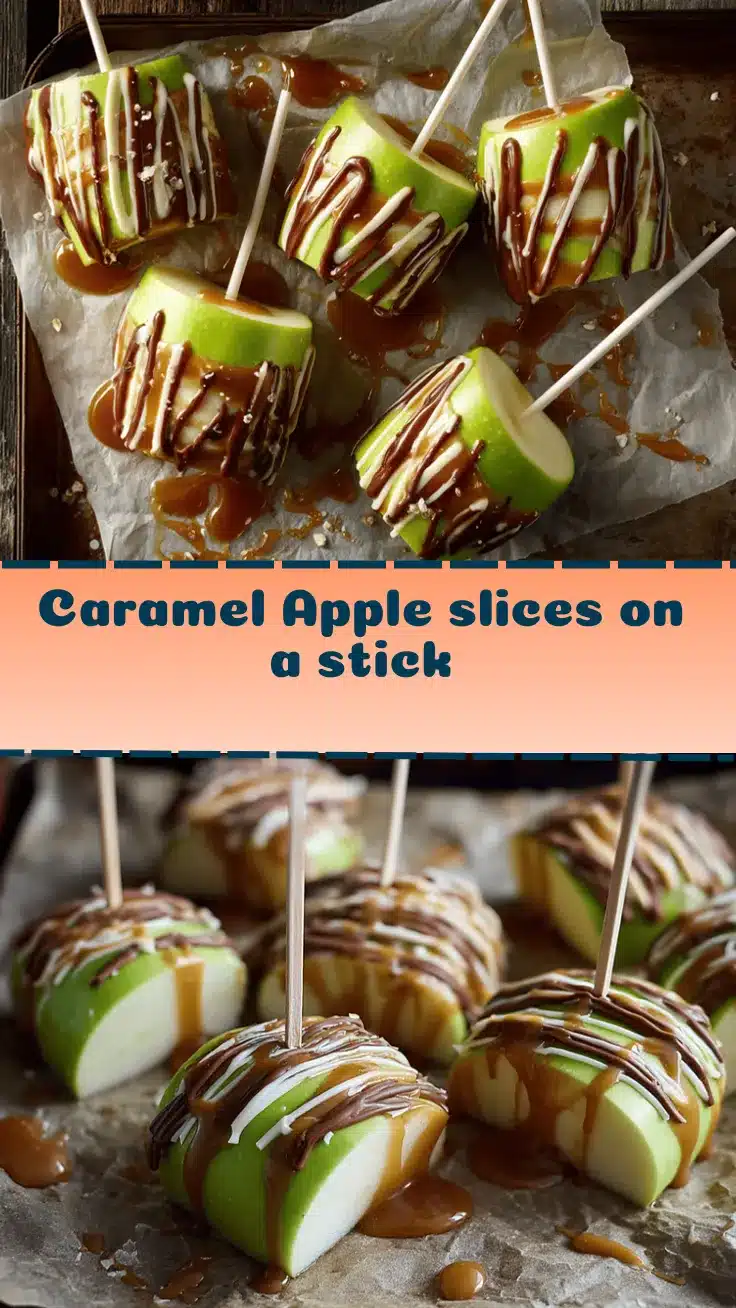

Caramel Apple Slices on a Stick – Easy Autumn Party Tray Recipe
- Total Time: 30 minutes
- Yield: 16-20 slices (serves 6-8 as a snack or party tray) 1x
Description
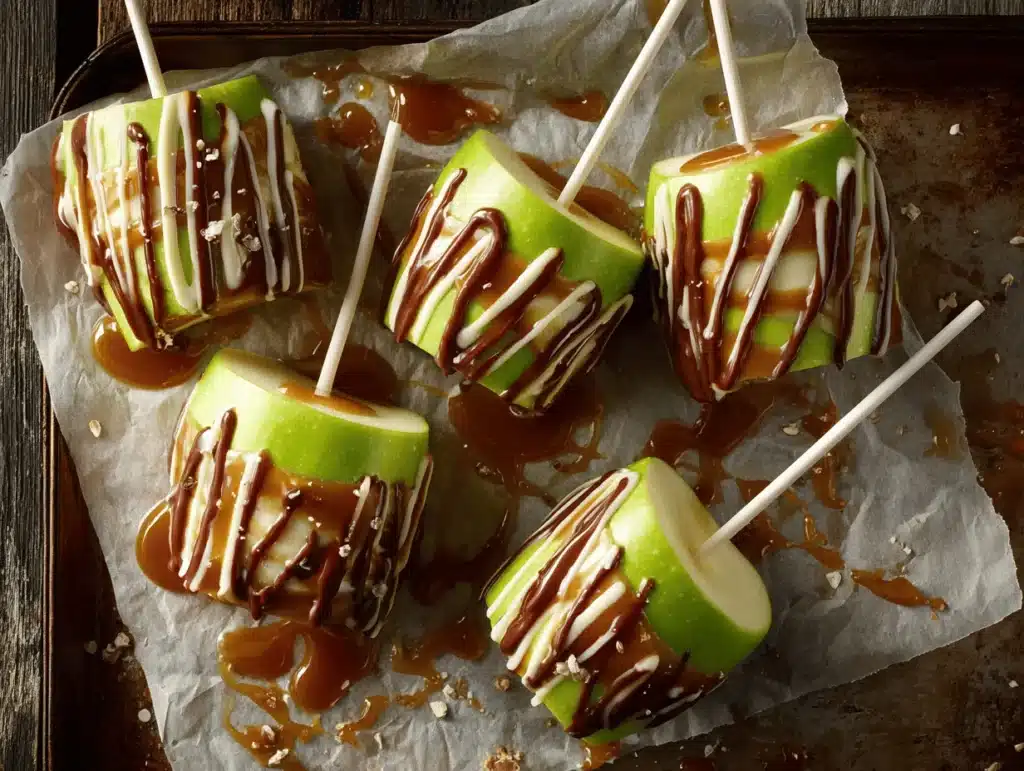
Caramel apple slices on a stick are a fun, easy, and less-messy twist on classic caramel apples. Perfect for autumn parties, these shareable treats feature tart apple slices dipped in silky caramel and customizable toppings for a crowd-pleasing snack.
Ingredients
- 4 medium tart apples (Granny Smith, Honeycrisp, or Fuji)
- 1 cup store-bought or homemade caramel (about 30 Kraft squares)
- 2 tablespoons heavy cream
- 2 tablespoons lemon juice
- 16–20 wooden sticks or popsicle sticks
- Toppings (choose 2-4): mini chocolate chips, chopped peanuts or pecans, crushed pretzels, rainbow sprinkles, toasted coconut flakes, graham cracker crumbs
- Optional: sea salt flakes, melted white or dark chocolate for drizzling, peanut butter or almond butter (thinned with milk for drizzling)
Instructions
- Wash and dry the apples. Cut each apple into 4-5 thick slices (about 1/2-inch thick). Remove seeds and core from each slice.
- Toss apple slices in lemon juice to prevent browning.
- Carefully insert a popsicle stick or wooden skewer into the bottom of each slice, pushing halfway for a secure hold.
- Place apple slices on a parchment-lined baking sheet and chill in the fridge or freezer for 10-15 minutes.
- In a small saucepan over low heat, melt caramel with heavy cream, stirring frequently until smooth and glossy (about 5 minutes). Alternatively, microwave in 30-second intervals, stirring each time.
- Remove apple slices from the fridge. Dip each slice into the caramel, swirling to coat one side. Let excess drip off.
- Immediately sprinkle or roll caramel-coated side in desired toppings while caramel is still soft. Lay finished slices back on the parchment-lined tray.
- Chill completed slices in the fridge for 10-15 minutes, or until caramel firms up.
- Serve cold for best crunch and gooeyness.
Notes
Chill apple slices before dipping for best caramel adhesion. Use full-fat caramel for smooth texture. For gluten-free, avoid graham crackers and pretzels. Set up a toppings station for easy assembly. Store leftovers in the fridge for up to 2 days, separated by parchment paper.
- Prep Time: 15 minutes
- Cook Time: 5 minutes
- Category: Dessert
- Cuisine: American
Nutrition
- Serving Size: 1 caramel apple slice
- Calories: 80110
- Sugar: 1518
- Sodium: 4080
- Fat: 25
- Saturated Fat: 12
- Carbohydrates: 1822
- Fiber: 12
- Protein: 0.5
Keywords: caramel apple slices, autumn party tray, kid-friendly dessert, easy caramel apples, party snack, fall recipe, apple dessert, caramel apples, customizable toppings