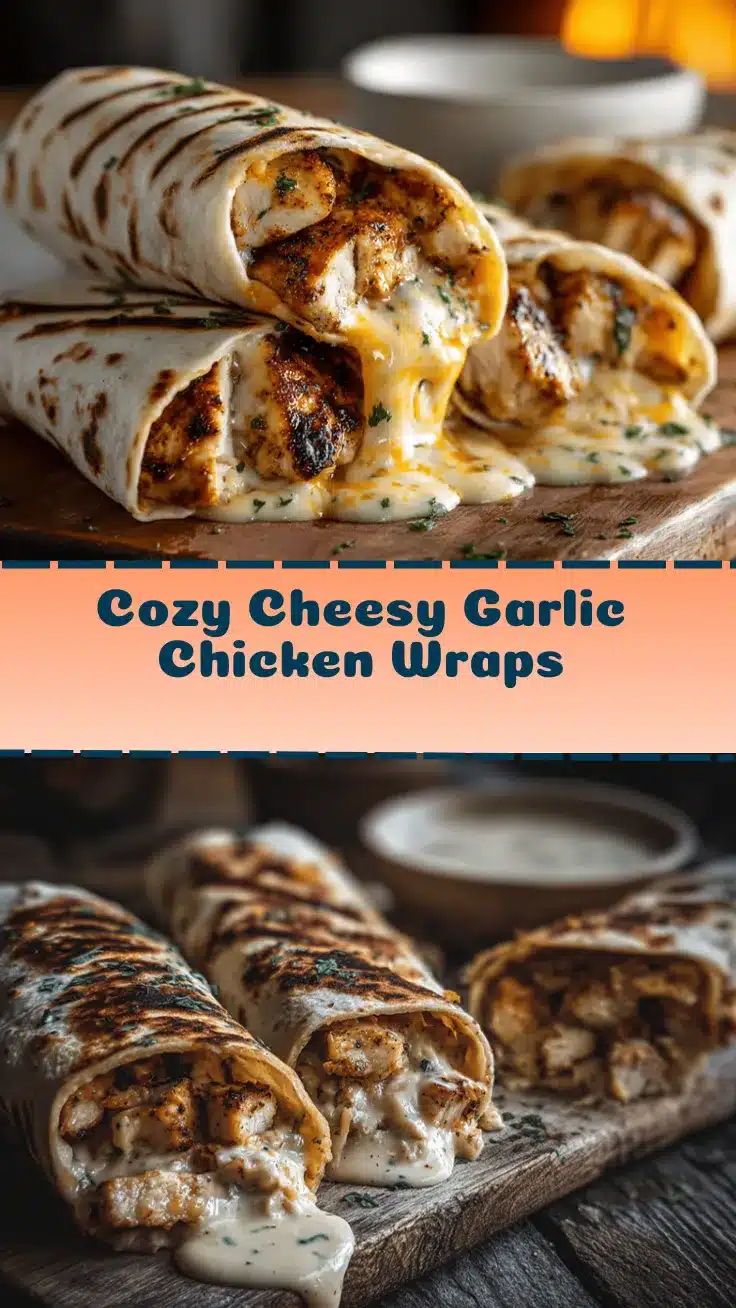
The sizzle of garlicky chicken hitting a hot pan might be one of my favorite kitchen sounds. There’s something about that rich aroma—cheese melting, tortillas warming, garlic dancing through the air—that just screams comfort. Honestly, these Cheesy Garlic Chicken Wraps have become my weeknight staple. It all started one rainy Tuesday when the fridge looked empty except for leftover rotisserie chicken, shredded cheese, and a half-eaten bulb of garlic. You know how sometimes you throw things together and hope for the best? Well, this recipe was born out of one of those “let’s wing it” moments, and now it’s a family classic.
I’ve tested these wraps more times than I care to admit. Sometimes I add a pinch of smoked paprika, other days I sneak in a handful of spinach. But the heart of the dish remains the same—juicy chicken, gooey cheese, and a punch of garlic wrapped up in a soft tortilla. It’s the kind of dinner that feels indulgent but comes together so fast you barely have time to set the table. Perfect for busy families, picky eaters, or anyone who wants a satisfying meal without fuss. Whether you’re a kitchen newbie or a seasoned cook, this cheesy garlic chicken wraps recipe is about to become your new comfort food hero.
As someone who’s spent way too much time tweaking chicken recipes, I can say with confidence that this wrap nails the balance of flavor, texture, and ease. There’s no fancy technique or obscure ingredient—just honest, craveable food that brings people together. If you’re searching for an easy homemade dinner idea, cheesy garlic chicken wraps might just be your answer. Ready to wrap up some goodness?
Why You’ll Love This Recipe
- Quick & Easy: Ready in under 30 minutes, even on your busiest weekdays. No complicated steps or waiting around.
- Simple Ingredients: Chicken, cheese, garlic, tortillas—nothing fancy here. Most of these are fridge or pantry staples.
- Perfect for Any Occasion: These wraps work for weeknight dinners, casual lunches, meal prep, or even game day snacks. I’ve made them for birthday parties, lazy Sundays, and rushed Tuesday evenings.
- Crowd-Pleaser: Kids devour them, adults ask for seconds, and everyone loves the melty, garlicky goodness. Even picky eaters get on board.
- Unbelievably Delicious: The combination of stretchy cheese, tender chicken, and that hit of garlic is pure comfort. Every bite makes you go “mmm” (and maybe close your eyes for a second).
What sets these Cheesy Garlic Chicken Wraps apart? For starters, I always use freshly minced garlic—none of that jarred stuff. It makes the flavor pop and gives you that irresistible aroma. Melting the cheese right onto the chicken before wrapping creates this gooey, restaurant-style texture. And let’s face it, wrapping everything up in a warm tortilla just feels cozy.
I’ve tried a lot of chicken wraps over the years. Some were dry, others bland, but this recipe hits that sweet spot. Whether you’re looking for something quick after soccer practice or want to impress your friends with a homemade dinner idea, these wraps deliver. Plus, you can jazz them up or keep them simple—totally up to you. Comfort food, but with a twist that keeps it interesting every time.
Honestly, it’s the kind of recipe that turns an ordinary night into something memorable. If you’re new to cooking or just tired of bland dinners, this is the wrap that’ll change your mind about easy meals. Give it a try and see why my family keeps coming back for more!
Ingredients Needed
This recipe uses straightforward ingredients to create flavor-packed, cheesy wraps that don’t require a trip to a specialty store. Most of these items are probably in your kitchen right now, making dinner a breeze.
- Cooked chicken breast, shredded or chopped (2 cups / 280g) (rotisserie or leftover grilled chicken works great)
- Shredded mozzarella cheese (1 cup / 120g) (for extra gooeyness—feel free to mix with cheddar or Monterey Jack)
- Shredded cheddar cheese (1/2 cup / 60g) (adds sharpness and color)
- Fresh garlic cloves, minced (3 cloves) (don’t skimp—this makes the flavor sing!)
- Large flour tortillas (4-6, depending on size) (use whole wheat or gluten-free if you prefer)
- Olive oil (1 tablespoon / 15ml) (for sautéing the garlic and chicken)
- Salt (1/2 teaspoon / 3g) (season to taste)
- Black pepper (1/4 teaspoon / 1g) (freshly cracked for a little kick)
- Italian seasoning (1 teaspoon / 2g) (optional, but adds nice herbiness)
- Fresh parsley, chopped (2 tablespoons / 8g) (for garnish and a pop of color)
Optional Add-ins:
- Spinach or arugula (a handful, for a veggie boost)
- Red onion, thinly sliced (for bite)
- Sliced tomatoes (add juiciness and freshness)
- Sour cream or Greek yogurt (for drizzling after cooking)
- Hot sauce (if you like a little heat)
Ingredient Notes & Substitutions:
- I usually grab Kirkland Signature rotisserie chicken for convenience, but any cooked chicken works.
- If you need a dairy-free option, swap regular cheese with a plant-based cheese blend (I’ve tried Daiya—it melts pretty well).
- For gluten-free wraps, I like Mission Gluten Free Tortillas.
- Not a fan of garlic? You can cut back to one clove or substitute with garlic powder (1/2 teaspoon), but fresh is best.
- Don’t have Italian seasoning? Use a mix of dried oregano and basil instead.
All these ingredients come together for wraps that are hearty and full of flavor, with plenty of room to personalize based on what you’ve got in your fridge or pantry. Don’t be afraid to experiment—some of my favorite versions happened when I was low on supplies!
Equipment Needed
- Large nonstick skillet (for sautéing chicken and garlic; cast iron works too)
- Cutting board & sharp knife (for chopping chicken and veggies)
- Garlic press or mincer (optional, but it saves time and keeps your fingers from smelling too garlicky!)
- Mixing bowl (to toss chicken, cheese, and seasonings)
- Kitchen tongs or spatula (for flipping and assembling wraps)
- Measuring cups & spoons (for accuracy—especially when it comes to seasoning)
- Aluminum foil or parchment paper (if you want to keep wraps warm or prep ahead for meal prep)
If you don’t have a skillet big enough, you can cook the filling in batches. I’ve used everything from my old nonstick pan to a cheap cast iron—both get the job done. If you’re low on gadgets, don’t stress; a regular kitchen knife and a sturdy spoon will work for most tasks.
Quick tip: If you use a garlic press, rinse it right away (garlic can get sticky and hard to clean). For budget-friendly tools, stores like IKEA offer decent spatulas and bowls that won’t break the bank. I’ve lost count of how many wraps I’ve made using just the basics!
Preparation Method
- Prep the Ingredients (5 minutes): Shred or chop your cooked chicken into small bite-sized pieces. Mince the garlic cloves. If you’re adding veggies, slice them now.
- Sauté the Garlic & Chicken (5 minutes): Heat 1 tablespoon (15ml) olive oil in a large skillet over medium heat. Add minced garlic and cook for 30 seconds until fragrant (don’t let it burn!). Add chicken and toss to combine with garlic. Stir in Italian seasoning, salt, and black pepper. Cook for 2-3 minutes until chicken is heated through and coated with seasoning. If you notice the garlic browning too quickly, lower the heat and keep stirring.
- Add the Cheese (2 minutes): Sprinkle shredded mozzarella and cheddar cheese over the chicken in the skillet. Stir until the cheese starts to melt and the mixture looks gooey and stringy. If you want extra cheesy wraps, add more cheese—it’s hard to go wrong here!
- Warm the Tortillas (2 minutes): While the chicken-cheese mixture is finishing up, warm tortillas in a dry pan or microwave for 20 seconds each. This makes them soft and easier to wrap.
- Assemble the Wraps (5 minutes): Lay a warm tortilla flat and spoon a generous portion of the cheesy garlic chicken filling down the center. Add optional toppings like spinach, onions, or tomatoes if you want. Fold the sides in, then roll up tightly from the bottom. If you’re new to wrapping, aim for a snug roll—don’t overstuff or things get messy!
- Toast (Optional, 5 minutes): For crispy wraps, return them to the skillet (seam side down) and cook over medium heat for 2-3 minutes per side until golden and slightly crisp. This step is totally optional but adds a nice crunch.
- Garnish & Serve (2 minutes): Slice wraps in half and sprinkle with fresh parsley. Serve immediately with your favorite dips or sides.
Troubleshooting: If your wraps start falling apart, try using slightly smaller portions or warming the tortillas longer. If the cheese isn’t melting, cover the pan for a minute to create steam. For a less garlicky bite, sauté garlic gently and use only two cloves.
Prep Notes: You can prep the chicken filling ahead and refrigerate for up to two days. Just warm and assemble when ready to eat. This helps on busy nights or for meal prepping lunches.
Personal tip: I love adding a splash of hot sauce to the chicken right before wrapping. It adds a subtle kick that balances the richness. Don’t stress if your wraps aren’t picture-perfect—they’ll taste amazing regardless!
Cooking Tips & Techniques
Let’s be real, not every wrap turns out pretty the first time. Here are some tips I’ve learned (sometimes the hard way!) to get the best cheesy garlic chicken wraps every time.
- Use freshly minced garlic: It makes a difference. Jarred garlic can taste a bit flat, and you want that vibrant flavor.
- Don’t overload the tortilla: Overstuffing leads to tears and messy plates. Keep the filling to about 1/3 cup (80g) per wrap.
- Warm tortillas before filling: Cold tortillas crack when you wrap them. Microwave or pan-toast for a few seconds—trust me, it’s worth it.
- Toast the wraps: If you want a crisp exterior, don’t skip the final skillet step. Even a minute per side makes a world of difference.
- Mix cheeses for flavor: Mozzarella gives stretch, cheddar brings sharpness. Don’t be afraid to experiment with gouda or provolone for a new twist.
Common Mistakes & How to Avoid Them:
- Burning the garlic: Watch it closely and keep the heat medium. Garlic turns bitter fast if overcooked.
- Filling falling out: Use a snug, tight wrap and tuck the sides in. If you’re struggling, try folding like a burrito.
- Dry chicken: If using leftover grilled chicken, add a splash of chicken broth to the skillet when reheating. It keeps the filling juicy.
Personal fail—one time I forgot to warm the tortillas, and they broke apart like wet paper. Lesson learned: always warm first! For consistency, prep all ingredients before you start cooking. Multitasking is easier when everything’s ready to go. If you’re cooking for a crowd, keep wraps warm in a low oven (about 200°F/95°C) until serving.
And remember, the best wraps are the ones you make your own. Don’t get hung up on perfection—comfort food is all about flavor and fun.
Variations & Adaptations
The beauty of cheesy garlic chicken wraps is how easily they adapt to your tastes or dietary needs. Here are some of my favorite ways to switch things up:
- Low-Carb/Keto: Swap flour tortillas with large lettuce leaves or low-carb wraps. Use extra cheese and add avocado for richness.
- Vegetarian: Replace chicken with sautéed mushrooms, roasted chickpeas, or grilled tofu. Still delicious, and you keep all the garlicky-cheesy vibes.
- Spicy Buffalo Style: Toss chicken in buffalo sauce before adding cheese. Top with shredded lettuce and a drizzle of ranch or blue cheese dressing.
- Seasonal Adaptations: In summer, add fresh tomatoes and basil. In winter, toss in roasted red peppers or caramelized onions for deeper flavor.
- Allergen Swaps: For dairy-free wraps, use vegan cheese and olive oil-based spreads. For gluten-free, stick with certified GF tortillas.
I’ve tried adding smoked paprika and chipotle powder for a smoky twist—highly recommend if you like bold flavors! If your family loves veggies, sneak spinach or kale into the wraps. The cheese hides it, and even my picky eater doesn’t complain.
Cooking method can change things up too. Grill the wraps for a BBQ vibe, bake them for a crispier shell, or even air fry for a lighter crunch. There’s no wrong way—just your way. Don’t be afraid to experiment!
Serving & Storage Suggestions
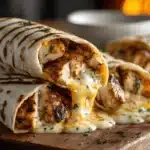
Serving: These wraps taste best hot and fresh from the skillet. Slice them in half for easy dipping and a pretty cross-section (great for those Pinterest photos!). Garnish with chopped parsley or a sprinkle of chili flakes if you want a kick.
Pair with a crisp green salad, roasted veggies, or classic potato wedges. A cold lemonade or sparkling water rounds things out perfectly. I love serving them with a simple garlic yogurt dip or salsa on the side—adds a zesty contrast.
Storage: Leftover wraps keep well in the fridge for up to 3 days. Wrap tightly in foil or place in an airtight container. For freezer storage, wrap individually in parchment paper, then place in a zip-top freezer bag. They’ll keep for up to 2 months.
Reheating: Reheat in a skillet over medium heat until warmed through and cheese is melty. Microwave works in a pinch, but the wraps might get a little soggy. For best results, toast in the oven at 350°F (175°C) for 10 minutes.
Over time, the garlic flavor deepens and the cheese gets extra gooey. Honestly, leftovers taste even better the next day—if you manage to save any!
Nutritional Information & Benefits
Each cheesy garlic chicken wrap (using a medium tortilla and standard filling) contains approximately:
- Calories: 350-400
- Protein: 25g
- Carbohydrates: 30g
- Fat: 16g
- Fiber: 2g
Health Benefits: Chicken is a lean source of protein, great for muscle recovery and keeping you full. Garlic offers immune-boosting properties and heart health benefits. Cheese provides calcium and flavor, and you can always use reduced-fat varieties if you prefer.
This recipe fits into most high-protein or low-carb diets with simple swaps. It’s naturally nut-free, and you can make it gluten-free or dairy-free with easy modifications. Always check your tortilla and cheese brands for allergens if you have sensitivities.
From my own wellness journey, I love that these wraps are satisfying without being heavy. They keep you energized and happy—exactly what comfort food should do!
Conclusion
Cheesy garlic chicken wraps are more than just a quick dinner—they’re the kind of meal that makes you look forward to eating at home. Simple ingredients, bold flavors, and a cozy vibe every time. Whether you stick to the classic or try out a fun variation, these wraps are sure to become a regular in your kitchen.
Honestly, I make them when I need a pick-me-up or want something everyone will actually eat (no complaints at my table!). Customize them to fit your cravings, and don’t be afraid to put your own spin on things.
If you try this recipe or have your own favorite twist, I’d love to hear about it! Drop a comment below, share your photos, or tag me on Pinterest with your creations. Here’s to easy dinners, big flavors, and finding comfort in a simple wrap. Happy cooking!
Frequently Asked Questions
Can I use raw chicken instead of cooked chicken for these wraps?
Absolutely! Just dice the raw chicken, sauté it with garlic and seasonings until fully cooked (about 6-8 minutes), then proceed with the recipe as written.
What’s the best cheese for cheesy garlic chicken wraps?
I love mozzarella for its stretch and cheddar for flavor, but Monterey Jack, provolone, or even pepper jack work great too. Use your favorite blend!
How do I keep my wraps from getting soggy?
Make sure the filling isn’t too wet and always toast the wraps in a skillet for a minute per side. If prepping ahead, let fillings cool before assembling.
Can I make these wraps ahead of time?
Yes! Prepare the filling and refrigerate. Assemble and toast wraps when you’re ready to eat. You can also freeze them, then reheat in the oven or skillet.
Are these wraps gluten-free?
The standard recipe uses flour tortillas, but you can easily swap for gluten-free wraps to make them suitable for gluten-free diets. Always check labels!
Pin This Recipe!
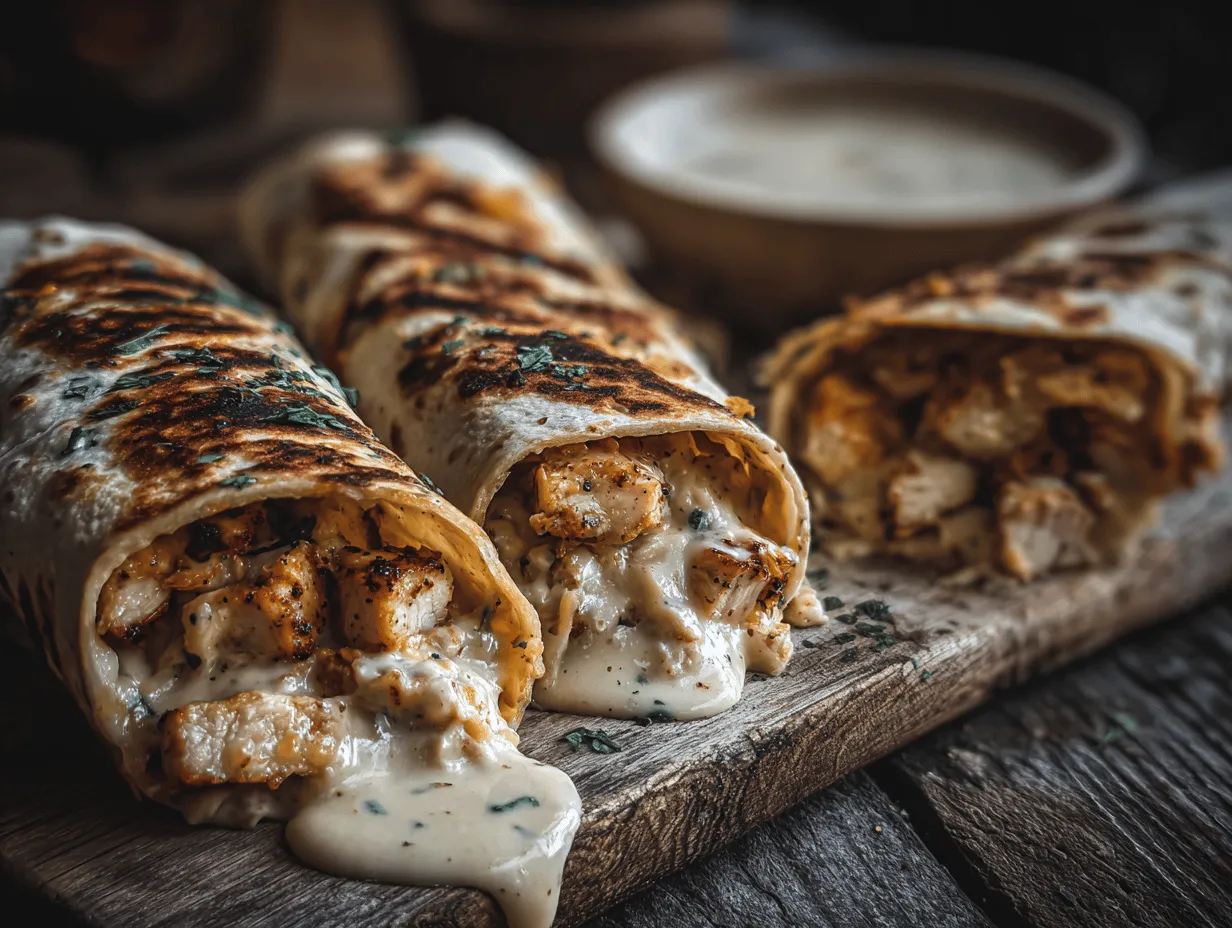
Cheesy Garlic Chicken Wraps
- Total Time: 20 minutes
- Yield: 4 servings 1x
Description
These Cheesy Garlic Chicken Wraps are a quick, comforting dinner packed with juicy chicken, gooey cheese, and fresh garlic, all wrapped in a warm tortilla. Perfect for busy weeknights, meal prep, or casual gatherings, this recipe is endlessly customizable and sure to please everyone at the table.
Ingredients
- 2 cups cooked chicken breast, shredded or chopped (about 10 oz)
- 1 cup shredded mozzarella cheese
- 1/2 cup shredded cheddar cheese
- 3 fresh garlic cloves, minced
- 4–6 large flour tortillas
- 1 tablespoon olive oil
- 1/2 teaspoon salt
- 1/4 teaspoon black pepper
- 1 teaspoon Italian seasoning (optional)
- 2 tablespoons fresh parsley, chopped (for garnish)
- Optional: handful of spinach or arugula
- Optional: thinly sliced red onion
- Optional: sliced tomatoes
- Optional: sour cream or Greek yogurt (for serving)
- Optional: hot sauce
Instructions
- Shred or chop cooked chicken into bite-sized pieces. Mince garlic cloves. Slice any optional veggies.
- Heat olive oil in a large skillet over medium heat. Add minced garlic and sauté for 30 seconds until fragrant.
- Add chicken to the skillet and toss with garlic. Stir in Italian seasoning, salt, and black pepper. Cook for 2-3 minutes until chicken is heated through.
- Sprinkle mozzarella and cheddar cheese over the chicken. Stir until cheese melts and mixture is gooey.
- Warm tortillas in a dry pan or microwave for 20 seconds each until soft.
- Lay a tortilla flat and spoon about 1/3 cup of the cheesy garlic chicken filling down the center. Add optional toppings if desired.
- Fold the sides in and roll up tightly from the bottom to form a wrap.
- Optional: Return wraps to the skillet, seam side down, and toast for 2-3 minutes per side until golden and slightly crisp.
- Slice wraps in half, garnish with fresh parsley, and serve immediately with your favorite dips or sides.
Notes
Use freshly minced garlic for best flavor. Don’t overstuff tortillas to prevent tearing. Toasting wraps in the skillet adds a crispy exterior. For gluten-free or dairy-free options, substitute tortillas and cheese as needed. Prep chicken filling ahead for quick assembly. Leftovers taste great and can be reheated in the oven or skillet.
- Prep Time: 10 minutes
- Cook Time: 10 minutes
- Category: Main Course
- Cuisine: American
Nutrition
- Serving Size: 1 wrap (using a medium tortilla and standard filling)
- Calories: 375
- Sugar: 2
- Sodium: 650
- Fat: 16
- Saturated Fat: 7
- Carbohydrates: 30
- Fiber: 2
- Protein: 25
Keywords: chicken wraps, cheesy garlic chicken, easy dinner, comfort food, quick meal, weeknight recipe, meal prep, family friendly, skillet wraps