The sound of sizzling chicken mixed with that tangy, spicy aroma—honestly, nothing says “game day” quite like the first bite of a sheet pan Buffalo chicken slider. I remember the first time I whipped these up for a last-minute Super Bowl gathering. It was chaos in the kitchen, but those golden, pull-apart sliders came out hot and bubbling. They disappeared in minutes (I barely snagged one before my friends demolished the tray!).
Sheet pan Buffalo chicken sliders have become my go-to whenever I need something easy, crowd-pleasing, and just a little bit indulgent. There’s something magical about how the buttery rolls soak up the Buffalo sauce, and the chicken stays juicy thanks to the simple sheet pan method. I’ve tested this recipe more times than I can count—sometimes with leftover rotisserie chicken, other times with freshly poached breasts. Each time, the sliders are a hit, whether it’s a cozy family movie night or a backyard grilling party.
I love how these sliders pack bold flavor without a ton of work. You get that classic Buffalo chicken kick, creamy cheese melting into every bite, and just the right crunch from the toasted tops. If you’re searching for an easy game day recipe for a crowd, these sheet pan Buffalo chicken sliders are where convenience meets crave-worthy comfort food. Plus, they’re fun to customize—add blue cheese, ranch, or extra jalapeños if you dare. As someone who’s hosted more parties than I can count, trust me: you’ll want to bookmark this recipe. It’s the sort folks request again and again (and you know, I never mind making another batch!).
Why You’ll Love This Recipe
When it comes to sheet pan Buffalo chicken sliders, I’m telling you—these little sandwiches tick all the boxes for game day greatness. Here’s why I keep coming back and why you will, too:
- Quick & Easy: From start to finish, these sliders are ready in about 40 minutes. No complicated prep, no fancy equipment, just simple steps anyone can follow. Perfect for those moments when you realize you’ve got a hungry crowd arriving soon!
- Simple Ingredients: You probably already have most of what you need: cooked chicken, Buffalo sauce, slider rolls, cheese, and a few extras. No need to run to specialty stores (I’ve made these on a whim with pantry staples more than once).
- Perfect for Game Day: These sheet pan Buffalo chicken sliders are tailor-made for sharing. Whether you’re hosting a big football bash or just hanging with friends, they’re easy to portion and serve hot from the oven.
- Crowd-Pleaser: I haven’t met a person who doesn’t love them. Kids dig the cheesy, saucy goodness. Adults appreciate the spicy kick. Even picky eaters get on board when there’s melted cheese involved!
- Unbelievably Delicious: The combination of juicy chicken, tangy Buffalo sauce, soft slider rolls, and gooey cheese? It’s pure comfort food. The sheet pan method ensures everything is toasted just right—no soggy buns here.
What makes this recipe stand out is the sheet pan technique. Instead of piling sliders together and hoping for the best, you spread everything out, layer the flavors, and bake until golden. It’s easy, reliable, and mess-free (I learned this the hard way after a few soggy slider disasters). Plus, you can tweak the heat level, cheese type, or toppings to suit your crowd.
Honestly, these sliders are the kind you crave after a long day or when you’re celebrating a win. They deliver all the best parts of Buffalo wings—without the sticky fingers or extra cleanup. If you want comfort food that’s simple yet absolutely satisfying, sheet pan Buffalo chicken sliders are a must-try. I guarantee they’ll earn a permanent spot in your game day rotation!
Ingredients Needed
Let’s talk about what you’ll need to make irresistible sheet pan Buffalo chicken sliders. The beauty of this recipe is that it uses everyday ingredients—nothing fancy, just real flavor. Here’s what goes into each layer:
- For the Chicken Mixture:
- 2 cups cooked chicken, shredded (about 300g; rotisserie works great, or poach your own in advance)
- 1/2 cup Buffalo sauce (120ml; I love Frank’s RedHot for authentic flavor)
- 2 tablespoons unsalted butter, melted (30g; adds richness and that classic Buffalo taste)
- 1/4 teaspoon garlic powder (a little savory boost)
- Salt and pepper to taste (start with 1/4 teaspoon each and adjust as you mix)
- For Assembling the Sliders:
- 12 slider rolls or mini buns (I prefer King’s Hawaiian; soft and slightly sweet, but any sturdy slider bun works)
- 6 slices provolone or mozzarella cheese (about 120g; you can use cheddar for more bite or mix types)
- 1/2 cup ranch dressing (120ml; drizzle or serve on the side—optional but highly recommended)
- 1/4 cup thinly sliced green onions (25g; for freshness and crunch)
- 1/4 cup crumbled blue cheese (optional; 30g, for classic Buffalo flavor fans)
- Pickled jalapeños (as desired, for heat)
- For the Topping:
- 2 tablespoons melted butter (30g; for brushing the tops)
- 1 teaspoon dried parsley or chives (for color)
- 1/2 teaspoon garlic powder (extra flavor boost)
These ingredients come together for bold flavor and satisfying texture. If you’re out of Buffalo sauce, you can mix hot sauce with a splash of vinegar and melted butter. For dairy-free, swap the cheese for plant-based slices and use vegan butter. Gluten-free buns work just fine, too—I’ve made these for celiac friends without a hitch.
Want to stretch the recipe for a bigger crowd? Double everything, use two sheet pans, and you’re set. Sometimes I’ll toss in extra veggies like diced celery or red onion for crunch. You can even swap the ranch for blue cheese dressing, or skip it altogether if you prefer classic Buffalo heat.
Don’t stress if you’re missing an ingredient—these sliders are forgiving. As long as you keep the chicken, Buffalo sauce, and cheese in the mix, you’ll end up with something delicious. And honestly, I’ve made these with leftover turkey after Thanksgiving and nobody noticed!
Equipment Needed
Here’s what I use every time I make sheet pan Buffalo chicken sliders. Most of these are kitchen basics, but a couple of extras make the process smoother:
- Sheet Pan (13×18-inch/33x46cm): Essential for this recipe! If you don’t have a large one, use two smaller pans or bake in batches.
- Parchment Paper or Foil: For easy cleanup and to prevent sticking. Trust me—you’ll thank yourself later.
- Mixing Bowl: For tossing the chicken with Buffalo sauce and seasonings.
- Small Microwave-Safe Bowl: For melting butter (if you’re old-school, a saucepan works too).
- Brush: For spreading melted butter on the slider tops. You can use the back of a spoon if you don’t have a brush.
- Sharp Knife and Cutting Board: For slicing rolls and prepping toppings.
- Aluminum Foil: Optional, for covering sliders if they brown too quickly.
I’ve made these with basic baking sheets, but if you want crispy bottoms, opt for a heavy-duty pan. If you’re on a budget, dollar store pans work in a pinch; just be gentle and avoid warping. When it comes to cleanup, parchment paper is a lifesaver.
If you’re making a double batch, borrow a second sheet pan from a neighbor or stack two smaller ones side by side. For melting butter, I usually use a glass bowl and zap it in the microwave—less mess, more speed. Oh, and if you don’t have a brush, don’t sweat it; just drizzle and spread with a spoon.
Preparation Method

Ready to make sheet pan Buffalo chicken sliders? Here’s my tried-and-true method, broken down step by step. I’ve included measurements, time estimates, and a few troubleshooting tips I’ve learned along the way.
-
Preheat your oven: Set to 350°F (175°C). Line your sheet pan with parchment paper or foil for easy cleanup.
Time: 5 minutes -
Prepare the chicken: In a large mixing bowl, combine 2 cups (300g) shredded chicken, 1/2 cup (120ml) Buffalo sauce, 2 tablespoons (30g) melted butter, 1/4 teaspoon garlic powder, salt, and pepper. Toss until every piece is coated and juicy.
Time: 2 minutes
Prep Note: If your chicken is cold, microwave it for 30 seconds before mixing—warm chicken absorbs sauce better. -
Slice the slider rolls: Using a sharp knife, split the 12 slider rolls horizontally, keeping the bottoms and tops intact (like two large sheets).
Time: 2 minutes
Sensory Cue: Rolls should be soft but sturdy—if they crumble, use a gentle sawing motion. -
Layer the bottom halves: Place the bottom halves of the slider rolls on your prepared sheet pan. Spread evenly so they form a solid base.
Time: 1 minute -
Add the chicken mixture: Spoon the Buffalo chicken evenly over the rolls, making sure every bite gets some sauce.
Time: 2 minutes
Troubleshooting: If mixture seems dry, drizzle extra Buffalo sauce over the top. -
Add cheese and toppings: Lay 6 slices of provolone or mozzarella (about 120g) across the chicken. Sprinkle 1/4 cup (25g) green onions and 1/4 cup (30g) crumbled blue cheese (if using). Scatter pickled jalapeños for spice.
Time: 2 minutes -
Replace the tops: Place the top halves of the rolls over the layered chicken and cheese.
Time: 1 minute
Prep Note: Press gently so everything holds together but don’t squash the rolls. -
Brush with butter topping: In a small bowl, mix 2 tablespoons (30g) melted butter, 1 teaspoon dried parsley or chives, and 1/2 teaspoon garlic powder. Brush over the tops of the rolls for flavor and color.
Time: 2 minutes
Sensory Cue: Rolls should look glossy and smell garlicky. -
Bake: Place sheet pan in the oven and bake for 18–22 minutes, until cheese is melted and tops are golden brown.
Time: 20 minutes
Troubleshooting: If tops brown too fast, cover loosely with foil for last 5 minutes. -
Slice and serve: Remove pan from oven and let sliders cool for 2–3 minutes. Use a sharp knife or spatula to cut into individual sliders.
Time: 3 minutes
Serving Note: Serve with ranch dressing for dipping and extra Buffalo sauce if you like it hot!
Efficiency tip: Prep toppings while the chicken bakes, and you’ll save a few precious minutes. If making ahead, assemble everything except the butter topping, cover, and refrigerate. Bake just before guests arrive for maximum wow factor.
Cooking Tips & Techniques
After making these sheet pan Buffalo chicken sliders a dozen times (sometimes on autopilot during playoff season), I’ve picked up a few tricks for perfect results. Let’s face it, not every batch has been flawless, but those little mishaps taught me a lot!
- Layer evenly: Spread the chicken mixture so every slider gets equal flavor—don’t leave the edges bare. Sometimes I’ve piled everything in the middle by accident and ended up with sad, empty corners.
- Don’t overbake: Watch the sliders in the last 5 minutes. If you leave them in too long, the buns can get tough. I’ve set a timer every time since one batch came out crunchy as croutons!
- Cover if needed: If the tops brown too quickly, tent loosely with foil. This keeps the cheese gooey and the rolls tender.
- Preheat fully: Make sure the oven’s hot before baking. I rushed once, and the sliders turned out uneven—some cold, some scorched.
- Use fresh cheese: Pre-shredded cheese doesn’t melt as smoothly. Slice your own for that oozy, Instagram-worthy pull.
- Multitask like a pro: While the sliders bake, prep your dips and drinks. Chop veggies, pour ranch, and set out plates so you’re ready to serve hot.
- Keep rolls together: Don’t separate the slider rolls before slicing. Keeping them as one sheet lets you layer everything neatly and slice after baking for perfect presentation.
- Customize heat: Adjust Buffalo sauce to taste. If you’re worried about spice, mix in a little extra butter or ranch.
If you mess up (and we all do), don’t panic. Soggy bottoms? Next time, use a heavier sheet pan or toast the bottom rolls for a few minutes before layering. Too spicy? Serve with extra ranch or a sprinkle of sugar in the sauce. Cooking is all about learning as you go—these sliders are forgiving and fun!
Variations & Adaptations
Sheet pan Buffalo chicken sliders are flexible, so you can tweak them to fit just about any diet or taste. I love experimenting, and here are a few versions that have worked for me:
- Low-Carb/Keto: Swap regular slider buns for mini low-carb rolls or use large lettuce leaves as the “bun.” I’ve tried it with cloud bread—surprisingly tasty and holds up well!
- Vegetarian: Skip the chicken and use roasted cauliflower florets tossed in Buffalo sauce. Add a bit of chickpea mash for protein. My veggie friends rave about this version!
- Gluten-Free: Use gluten-free slider rolls (Schar brand works well) or make your own with gluten-free flour. Everything else stays the same.
- Seasonal Twist: Add diced celery and carrots for crunch, especially in spring. In fall, swap Buffalo sauce for BBQ and use leftover turkey.
- Cheese Lovers: Layer in extra cheese—sharp cheddar, pepper jack, or even smoked gouda for a flavor punch. I once threw in four different cheeses, and it was a melty masterpiece!
- Allergen Friendly: For dairy-free, use vegan cheese and plant-based butter. For egg allergies, check your slider buns’ ingredients or make your own.
- Different Cooking Methods: Don’t have an oven? Assemble on a grill-safe pan, cover with foil, and bake over indirect heat for 20 minutes. Works great at summer cookouts!
My personal favorite adaptation is the veggie version with Buffalo cauliflower and extra blue cheese. It’s just as satisfying and perfect for Meatless Mondays. Don’t be afraid to get creative—these sliders are all about making game day your way!
Serving & Storage Suggestions
Serve these sheet pan Buffalo chicken sliders hot and fresh from the oven. I like to pile them onto a big platter, sprinkle with extra green onions and a drizzle of ranch, and let folks pull them apart themselves—there’s something fun about just grabbing one!
For game day, pair with crisp celery and carrot sticks, a big bowl of ranch or blue cheese dip, and cold drinks (beer or lemonade is always a hit). If you want to make it a meal, serve with loaded potato wedges or a simple salad.
Leftovers? Pop sliders into an airtight container and refrigerate for up to 3 days. Reheat in the oven at 350°F (175°C) for 7–10 minutes—this keeps the buns from getting soggy. You can also freeze baked sliders for up to 1 month; wrap tightly in foil and reheat straight from the freezer (add a few extra minutes).
Flavor tip: I swear the Buffalo sauce intensifies overnight! If you like a milder taste, eat fresh. For more punch, let them sit and reheat the next day.
Nutritional Information & Benefits
Each sheet pan Buffalo chicken slider is roughly 180–220 calories (depending on cheese, sauce, and buns), with about 13g protein, 12g carbs, and 9g fat. Using lean chicken breast keeps them high-protein and relatively light, especially if you go easy on the cheese and butter.
Buffalo sauce delivers a spicy kick without loads of sugar, and you can cut sodium by making your own or choosing low-salt options. The green onions and optional celery add vitamins and crunch. For gluten-free diets, use GF buns; for dairy-free, swap cheese and butter.
Allergens: Contains dairy, wheat, and potential egg (in buns). If serving to a crowd, label accordingly. From a wellness perspective, these sliders offer a fun way to get protein and fiber (especially if you add veggies) without feeling weighed down—a treat that fits most balanced meal plans!
Conclusion
If you’re searching for the ultimate game day recipe, these sheet pan Buffalo chicken sliders deliver every time. They’re spicy, cheesy, satisfying, and ridiculously easy to make for a crowd. You can customize them with whatever you have on hand, swap out ingredients, and still get that “wow” moment when you pull them from the oven.
Personally, I love how these sliders bring people together—everyone’s hands reaching for another, laughter in the air, and those happy sighs after the first bite. It’s comfort food with a kick, made for sharing and celebrating.
So go ahead, try these irresistible sheet pan Buffalo chicken sliders for your next party, tailgate, or family night. Let me know in the comments how you made them your own, or share your game day stories! I can’t wait to hear how they turn out for you—here’s to good food and great company!
Frequently Asked Questions
Can I make sheet pan Buffalo chicken sliders ahead of time?
Absolutely! Assemble everything except the butter topping, cover, and refrigerate. Brush with butter and bake when ready to serve. They taste best fresh but reheat well.
What can I use instead of Buffalo sauce?
Mix hot sauce with melted butter and a splash of vinegar for a quick substitute. BBQ sauce works for a milder, smoky flavor.
Are these sliders gluten-free?
With gluten-free slider buns, yes! All other ingredients are naturally gluten-free, but always check labels for hidden wheat or gluten.
Can I freeze leftover sliders?
Definitely. Wrap tightly in foil and freeze for up to a month. Reheat in the oven at 350°F (175°C) until warmed through.
How spicy are these sliders?
They’re medium-hot with standard Buffalo sauce. Adjust heat by using less sauce or mixing with extra butter. Add jalapeños for more kick, or serve with ranch to cool things down.
Pin This Recipe!
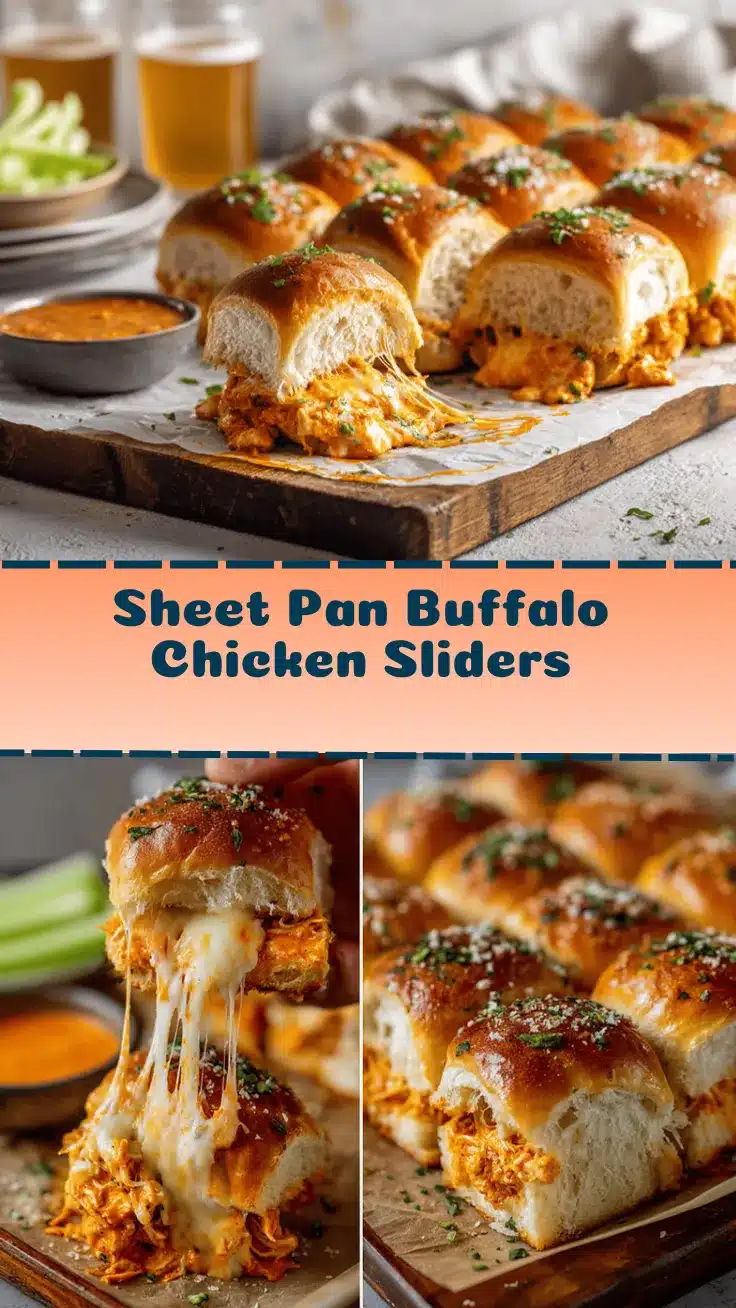

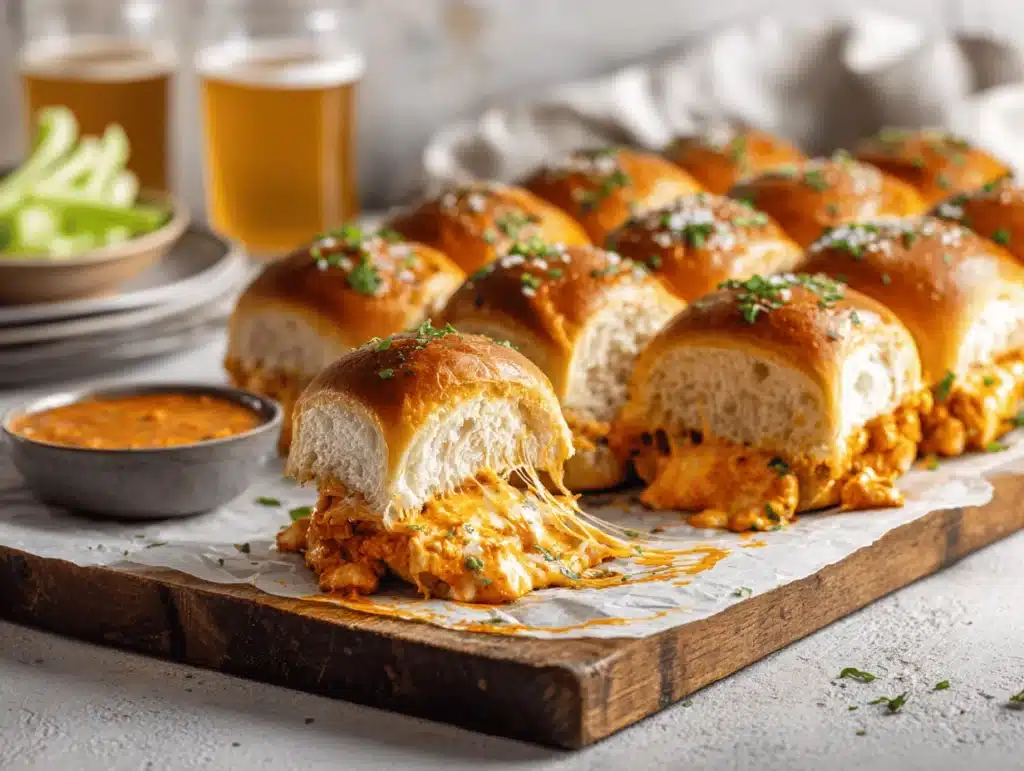
Sheet Pan Buffalo Chicken Sliders
- Total Time: 35 minutes
- Yield: 12 sliders 1x
Description
These sheet pan Buffalo chicken sliders are the ultimate game day crowd-pleaser—spicy, cheesy, and easy to make in under an hour. Juicy chicken, tangy Buffalo sauce, and melty cheese come together in buttery slider rolls for a crave-worthy comfort food experience.
Ingredients
- 2 cups cooked chicken, shredded (about 10 oz; rotisserie or poached)
- 1/2 cup Buffalo sauce (such as Frank’s RedHot)
- 2 tablespoons unsalted butter, melted
- 1/4 teaspoon garlic powder
- Salt and pepper to taste (about 1/4 teaspoon each)
- 12 slider rolls or mini buns (such as King’s Hawaiian)
- 6 slices provolone or mozzarella cheese (about 4 oz)
- 1/2 cup ranch dressing (optional, for serving or drizzling)
- 1/4 cup thinly sliced green onions
- 1/4 cup crumbled blue cheese (optional)
- Pickled jalapeños (as desired)
- 2 tablespoons melted butter (for topping)
- 1 teaspoon dried parsley or chives
- 1/2 teaspoon garlic powder (for topping)
Instructions
- Preheat oven to 350°F (175°C). Line a sheet pan with parchment paper or foil.
- In a large mixing bowl, combine shredded chicken, Buffalo sauce, melted butter, garlic powder, salt, and pepper. Toss until evenly coated.
- Using a sharp knife, slice slider rolls horizontally, keeping bottoms and tops intact as two sheets.
- Place bottom halves of rolls on prepared sheet pan, forming a solid base.
- Spoon Buffalo chicken mixture evenly over the rolls.
- Lay cheese slices over chicken, then sprinkle with green onions, blue cheese (if using), and pickled jalapeños.
- Place top halves of rolls over the layered chicken and cheese. Press gently.
- In a small bowl, mix melted butter, dried parsley or chives, and garlic powder. Brush over tops of rolls.
- Bake for 18–22 minutes, until cheese is melted and tops are golden brown. Cover loosely with foil if tops brown too quickly.
- Remove from oven and let cool for 2–3 minutes. Slice into individual sliders and serve with ranch dressing and extra Buffalo sauce if desired.
Notes
Layer chicken mixture evenly for best flavor. Watch sliders in last 5 minutes to avoid overbaking. Cover with foil if tops brown too quickly. Use fresh cheese for best melt. Can be made ahead—assemble and refrigerate, then bake before serving. Adapt with gluten-free buns, vegan cheese, or Buffalo cauliflower for dietary needs.
- Prep Time: 15 minutes
- Cook Time: 20 minutes
- Category: Appetizer
- Cuisine: American
Nutrition
- Serving Size: 1 slider
- Calories: 200
- Sugar: 3
- Sodium: 480
- Fat: 9
- Saturated Fat: 4
- Carbohydrates: 12
- Fiber: 1
- Protein: 13
Keywords: Buffalo chicken sliders, sheet pan sliders, game day recipe, party food, easy appetizer, chicken sliders, crowd-pleaser, spicy sliders, comfort food