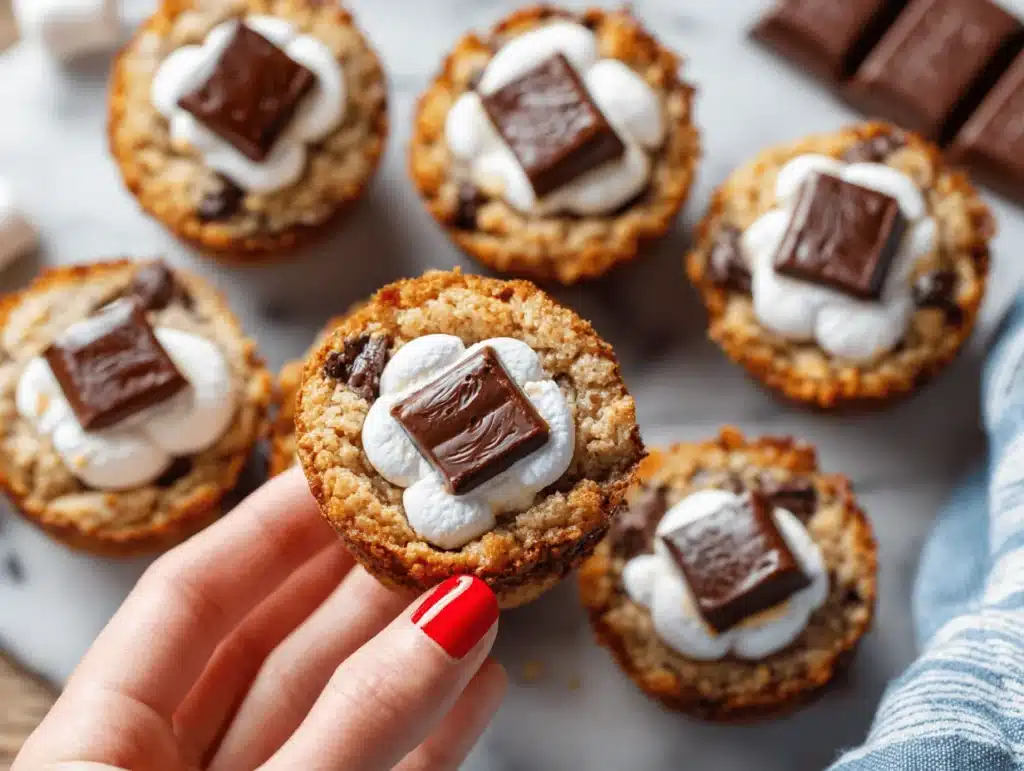
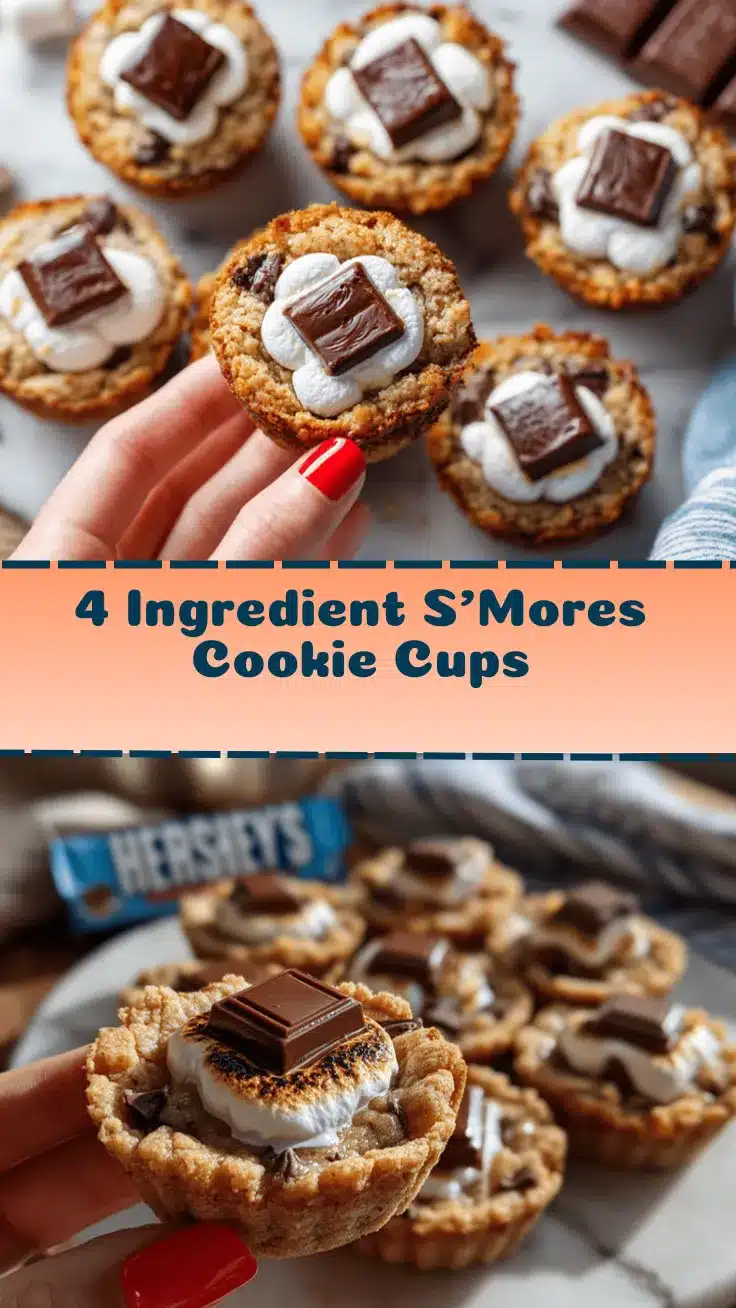
The crunch of golden graham crackers, gooey chocolate, and that unmistakable toasted marshmallow—all packed into a single, bite-sized treat. That’s what you get with these Easy 4 Ingredient S’Mores Cookie Cups! Honestly, the first time I made these, my kitchen smelled like summer camp, and my kids swarmed the oven before the timer even dinged. If you love classic s’mores but don’t want the mess or the bonfire drama, this recipe is going to steal your dessert-loving heart.
I stumbled upon the idea for s’mores cookie cups during a weekend bake sale prep, desperate for something that had all the nostalgic flavor but could be whipped up in less than half an hour. Let’s face it, sometimes you want that gooey goodness without the sticky fingers or hunting for skewers. These cookie cups are ridiculously simple—just four easy ingredients—and you can prep them with kids, friends, or all on your own for a cozy night in. I’ve tested this recipe more times than I can count (over a dozen, at least) and every batch is a hit, whether it’s for a party or a quick after-school treat.
What I love most is how SMores Cookie Cups recipe packs all the flavor and fun of the original s’mores into a neat, portable dessert. You don’t need fancy equipment, weird ingredients, or a campfire. Just a muffin tin, a handful of staples, and a little bit of kitchen magic. If you’re looking for a dessert swap that’s perfect for busy families, picky kids, or anyone craving a sweet fix on the fly, you’ve landed in the right spot. So grab your apron and let’s dive into the easiest, most fun cookie cups you’ll ever bake!
Why You’ll Love This SMores Cookie Cups Recipe
- Quick & Easy: Seriously, these come together in under 25 minutes (including baking time). No chilling, rolling, or complicated steps—just mix, assemble, and bake.
- Simple Ingredients: Only four ingredients! You probably have them in your pantry already—no wild grocery runs needed.
- Perfect for Any Occasion: Great for school lunches, birthday parties, potlucks, holiday gatherings, or just a cozy movie night at home. They travel well and always look so cute on a platter.
- Crowd-Pleaser: I’ve never met a person (kid or grown-up) who didn’t love these. Sweet, gooey, crunchy—there’s something for everyone.
- Unbelievably Delicious: The combo of buttery cookie base, melty chocolate, and marshmallow is pure comfort food. One bite and you’ll know exactly why I keep making these.
What sets my SMores Cookie Cups recipe apart? For starters, the cookie base is made from pre-made dough, so you skip all the measuring and mixing. But here’s the kicker—I press a square of chocolate right into the warm cookie base, then top it with a marshmallow and broil it until perfectly toasted. You know that crispy, caramelized marshmallow top? You get it every single time, no fire required. I’ve tried swapping in different chocolates and even flavored marshmallows for fun, but the classic combo is always a winner.
These aren’t just any s’mores—they’re the kind that make you close your eyes after the first bite. They’re sweet, gooey, and just a little bit messy (in a good way). Need a dessert that’s impressive but totally stress-free? This recipe is your secret weapon. I promise, they’ll be gone before you know it.
Ingredients Needed for S’Mores Cookie Cups
This recipe is all about simplicity, but each ingredient plays a big role in that classic s’mores flavor. Best part? You can make swaps if needed, and I’ll share a few of my favorite tricks below.
- Premade Chocolate Chip Cookie Dough (about 16 oz or 450 g; chilled, not frozen) (forms the perfect cookie cup base—use your favorite brand, I like Pillsbury or Nestle for consistent results)
- Milk Chocolate Bars (about 2 standard-size bars, broken into 24 pieces; roughly 100 g) (classic Hershey’s is the gold standard, but any creamy milk chocolate works)
- Large Marshmallows (24 pieces) (regular size, not jumbo—these toast up perfectly and fit in the cups just right)
- Graham Crackers (2-3 full sheets, crushed for topping) (adds that unmistakable s’mores crunch—use plain, honey, or even cinnamon grahams for a little twist)
Ingredient Notes & Swaps:
- If you want a gluten-free version, use gluten-free cookie dough (brands like Sweet Loren’s work well) and gluten-free graham crackers.
- Dairy-free? Try Enjoy Life cookie dough and use a dairy-free chocolate like Hu or Endangered Species.
- Don’t have chocolate bars? Substitute with milk chocolate chips or chunks—just use about 1 tsp (5 g) per cup.
- You can swap the marshmallows for vegan brands if needed. Dandies makes a solid alternative.
- Want extra crunch? Mix a few graham cracker crumbs into the cookie dough before pressing it into the tin. (I do this sometimes for a little flavor kick!)
All four ingredients are easy to find and keep in the pantry or fridge. Honestly, the only “fussy” part is unwrapping the chocolate bars, and even that’s kind of fun with little helpers! If you’re feeling adventurous, you can play around with flavored chocolate (like caramel or peanut butter) or different cookie dough bases (try sugar cookie dough for a sweet twist).
Equipment Needed
- Mini Muffin Tin (24-cup preferred; standard muffin tins work, but cups will be larger and take longer to bake)
- Nonstick Cooking Spray or Butter (for greasing the tin—makes cleanup a breeze)
- Spoon or Small Cookie Scoop (for portioning dough)
- Small Glass or Tart Press (optional; helps press the dough into cups evenly—you can use your fingers instead)
- Oven Mitts (for safety when broiling the marshmallows)
- Wire Cooling Rack (so the cookie cups cool evenly and don’t get soggy)
If you don’t have a mini muffin tin, you can use a regular muffin pan—just adjust baking time and add a bit more dough per cup. I’ve used silicone pans for easy release (they’re budget-friendly and dishwasher safe). If you’re worried about sticking, a little extra spray or lining with mini paper cups helps a ton. My tart press is ancient, but fingers work just fine. Maintenance tip: soak your muffin pan in warm, soapy water right after baking so any melted chocolate wipes off easily!
Preparation Method

- Preheat your oven to 350°F (175°C). Lightly grease your mini muffin tin with nonstick spray or butter. (Tip: If you use a silicone pan, you can skip the spray.)
- Portion the dough: Using a small cookie scoop or spoon, drop about 1 tablespoon (20 g) of cookie dough into each muffin cup. If you’re using a standard-size muffin tin, use about 2 tablespoons (40 g) per cup.
- Press and shape: Gently press the dough into the bottom and up the sides of each cup to create a well. I use my thumb or a tart press here. (Don’t worry if they’re not perfect—just aim for a little space for chocolate and marshmallow!)
- Bake the cookie cups: Place the pan in the oven and bake for 10-12 minutes (mini cups) or 14-15 minutes (standard cups), until the edges are golden and the centers look set. (You might see a little bubbling—totally normal!)
- Shape while warm: As soon as you pull them out, use the back of a spoon to gently re-press the wells if the centers puffed up. (This step keeps the cups deep enough for the chocolate and marshmallow.)
- Add chocolate: Place one piece of chocolate (about 4 g) into each warm cookie cup. It’ll start to melt right away—yum!
- Top with marshmallow: Place one large marshmallow on top of each chocolate piece. (If marshmallows are too tall, slice in half for a snug fit.)
- Broil for the finish: Turn your oven to broil. Return the pan to the oven for 1-2 minutes, watching closely. Marshmallows should puff up and turn golden brown on top. (Don’t walk away—the difference between “perfectly toasted” and “charred” is about 30 seconds!)
- Sprinkle with graham cracker crumbs: As soon as the cups come out, sprinkle crushed graham crackers over each marshmallow. Press lightly so they stick.
- Cool and release: Let the cookie cups cool in the pan for 10 minutes. Then, gently twist or lift out with a butter knife. Transfer to a wire rack to cool completely—if you can wait!
Troubleshooting: If cookie cups stick, run a butter knife around the edges before lifting. If marshmallows slide off, try slicing them in half before broiling. (I’ve had a few “marshmallow escapees” over the years!) Sensory cue: you want golden, puffed tops and a warm, melty chocolate layer underneath.
Personal tip: Prep everything before you start—mise en place is your friend here. If the dough is too sticky, chill it for 5-10 minutes before pressing. These freeze well too, so batch bake if you’re in a snack-prepping mood!
Cooking Tips & Techniques
Here’s what I’ve learned from making S’Mores Cookie Cups dozens of times (and a few near disasters):
- Don’t overbake the cookie base. It should be golden on the edges but still soft in the center. Overbaked cups get too crisp and lose that chewy s’mores vibe.
- Broil with care. Marshmallows brown fast—keep the oven light on and watch like a hawk! Once, I looked away for a minute and ended up with a tray of smoky marshmallow hats.
- Use room-temperature cookie dough. It presses easier and bakes more evenly. If it’s too cold, let it sit out for 10 minutes.
- Try multitasking: While the cups bake, crush your graham crackers and break up the chocolate. Makes the assembly so much smoother.
- Consistency is key. Use a scoop for uniform sizes so everything bakes at the same rate. If you do a double batch, rotate the pan halfway through for even browning.
- Clean-up tip: Soak your pan right after baking; the melted marshmallows are sticky but come off easily with warm water.
For best results, don’t overcrowd the oven. If you’re making several pans, bake one at a time so the heat is even. And if you want extra gooeyness, press the chocolate into the cookie cup while it’s super warm. The chocolate will melt into the dough—so good!
Personal fail? Once I tried using jumbo marshmallows. They overflowed, stuck to everything, and turned into a sticky mess. Lesson learned: stick to regular size!
Variations & Adaptations
This recipe is a blank canvas. I love switching things up depending on the season, dietary needs, or just for fun. Here are a few favorites:
- Gluten-Free: Use gluten-free cookie dough and graham crackers. They turn out just as gooey and delicious. My best friend is celiac, and she’s obsessed!
- Vegan: Swap in vegan cookie dough, dairy-free chocolate, and vegan marshmallows. The texture is a tad different—chewier—but still awesome.
- Peanut Butter Twist: Add a teaspoon of peanut butter under the chocolate for a s’mores cup with a nutty kick. (I do this for my husband, who’s a peanut butter fanatic!)
- Holiday Flavors: During winter, try peppermint chocolate or cinnamon graham crackers. In summer, swap milk chocolate for white chocolate and add mini berries on top.
- Sugar Cookie Base: Use premade sugar cookie dough for a sweeter, buttery base. Kids love this version—it’s like a mashup of sugar cookies and s’mores!
- Different Cooking Method: If you don’t want to use the broiler, use a kitchen torch to toast the marshmallows individually. (It’s fun, but keep the kids back!)
One of my favorite adaptations was for a school bake sale—I made half the batch with dark chocolate and mini marshmallows for a “grown-up” twist. They disappeared just as fast as the classic ones!
Serving & Storage Suggestions
These S’Mores Cookie Cups are best served fresh, slightly warm, with gooey chocolate and marshmallow. But honestly, they’re also great at room temperature, which makes them perfect for parties or picnics.
- Serving: Stack them on a colorful platter or in muffin liners for easy grabbing. They’re adorable for dessert tables and look super Pinterest-worthy!
- Complementary Dishes: Pair with a cold glass of milk, hot cocoa, or even a scoop of vanilla ice cream. For adults, a dark roast coffee is bliss.
- Storage: Store in an airtight container at room temperature for up to 3 days. If your kitchen is warm, refrigerate after day 2.
- Freezing: Place cooled cookie cups in a freezer-safe bag or container. Freeze for up to 1 month. Thaw at room temp before serving—reheat gently if you want the chocolate melty.
- Reheating: Warm in the microwave for 10 seconds to revive the gooeyness. (Don’t overdo it, or marshmallows will get tough!)
- Flavor Development: The flavors meld and deepen overnight, so leftovers are just as tasty. Sometimes the graham cracker topping gets a little softer, but honestly, that’s part of the charm.
If you’re bringing them to a party, line a container with parchment paper and stack in layers. They travel well and don’t crumble easily—another reason I keep coming back to this recipe!
Nutritional Information & Benefits
One S’Mores Cookie Cup (based on the classic 4-ingredient recipe) has roughly:
- Calories: 110
- Fat: 4.5 g
- Carbs: 16 g
- Protein: 1 g
Health Highlights:
- Marshmallows are mostly sugar, but using regular size keeps portions in check.
- Milk chocolate offers a little calcium and magnesium.
- If you use whole grain graham crackers, you’ll get a bit of fiber.
This dessert is nut-free as written, but double-check your cookie dough and chocolate for cross-contamination if allergies are a concern. For gluten-free or dairy-free, use the swaps listed above. Personally, I love that these cookie cups are smaller than regular s’mores, so you get the treat without going overboard. They’re a fun way to satisfy a craving while keeping portions reasonable!
Conclusion
So, why should you try these Easy 4 Ingredient S’Mores Cookie Cups? They’re fast, foolproof, and totally crave-worthy. You get all the nostalgia of s’mores with none of the mess or hassle. Plus, you can adapt them for almost any dietary need or occasion. I make them year-round—sometimes for a quick weeknight treat, other times for big celebrations.
The best part? You can tweak the SMores Cookie Cups recipe to suit your taste or pantry. Play with the chocolate, swap the cookie base, or go wild with toppings. I’d love to hear how you make them your own! Leave a comment, share your photos, or tag me if you post your creations—let’s spread the cookie cup joy. You deserve a dessert that’s simple, sweet, and a little bit nostalgic. Go ahead, bake a batch and make some memories!
Frequently Asked Questions
Can I use homemade cookie dough instead of premade?
Absolutely! Just use your favorite chocolate chip cookie recipe and portion out about 1 tablespoon per mini muffin cup. The baking time stays roughly the same.
How do I keep marshmallows from burning under the broiler?
Watch closely and broil for only 1-2 minutes. Marshmallows brown very quickly—don’t walk away! If your oven runs hot, broil with the door cracked and rotate the pan for even toasting.
Can I make these S’Mores Cookie Cups ahead of time?
Yes! Bake, cool, and store in an airtight container. They stay fresh for up to 3 days at room temp or a month in the freezer. Reheat briefly before serving if you want them gooey.
What’s the best way to release cookie cups from the pan?
Let them cool for 10 minutes, then use a butter knife to gently loosen the edges. If they’re sticking, a little extra spray or silicone liners help a ton.
Can I use mini marshmallows instead of large ones?
Yes, you can! Use 3-4 mini marshmallows per cup. They’ll melt a bit faster, so watch them under the broiler and remove when golden.
Pin This Recipe!

S’Mores Cookie Cups Recipe: Easy 4 Ingredient Fun Dessert Swap
- Total Time: 22 minutes
- Yield: 24 cookie cups 1x
Description
All the classic s’mores flavors—crunchy graham crackers, gooey chocolate, and toasted marshmallow—packed into a bite-sized cookie cup. This easy, 4-ingredient dessert is quick to make, kid-friendly, and perfect for parties or cozy nights in.
Ingredients
- 16 oz (1 package) premade chocolate chip cookie dough, chilled
- 2 standard-size milk chocolate bars (about 3.5 oz each), broken into 24 pieces
- 24 large marshmallows
- 2–3 full sheets graham crackers, crushed for topping
- Nonstick cooking spray or butter (for greasing the pan)
Instructions
- Preheat oven to 350°F (175°C). Lightly grease a 24-cup mini muffin tin with nonstick spray or butter.
- Using a small cookie scoop or spoon, drop about 1 tablespoon of cookie dough into each muffin cup.
- Press the dough into the bottom and up the sides of each cup to create a well.
- Bake for 10-12 minutes, until edges are golden and centers are set.
- Immediately after baking, use the back of a spoon to gently re-press the wells if centers puffed up.
- Place one piece of chocolate into each warm cookie cup.
- Top each with one large marshmallow (slice in half if too tall).
- Turn oven to broil. Return pan to oven for 1-2 minutes, watching closely, until marshmallows are golden brown.
- Remove from oven and sprinkle crushed graham crackers over each marshmallow, pressing lightly.
- Let cookie cups cool in the pan for 10 minutes, then gently release with a butter knife and transfer to a wire rack to cool completely.
Notes
Use room-temperature cookie dough for easier pressing and even baking. Watch marshmallows closely under the broiler—they brown quickly. For gluten-free or dairy-free, use appropriate swaps for cookie dough, chocolate, and graham crackers. Cookie cups freeze well for up to 1 month. If using a standard muffin tin, increase dough per cup and bake time slightly.
- Prep Time: 10 minutes
- Cook Time: 12 minutes
- Category: Dessert
- Cuisine: American
Nutrition
- Serving Size: 1 cookie cup
- Calories: 110
- Sugar: 10
- Sodium: 65
- Fat: 4.5
- Saturated Fat: 2.5
- Carbohydrates: 16
- Fiber: 0.5
- Protein: 1
Keywords: s'mores, cookie cups, easy dessert, kid-friendly, party treat, chocolate, marshmallow, graham cracker, summer dessert, bake sale